How To Crimp Battery Cables
Proper lug connection to the battery cable reduces the risk of electrical hazards. It's important to crimp cables properly to achieve this goal.
Battery cables carry the highest currents in any DC system, and therefore provide the greatest potential hazard. Whether you're wiring a lithium battery bank to an inverter, connecting a solar charge controller, or replacing the cables in an RV, golf cart, or forklift, it’s critical to have the correct lengths and the proper connections at both ends of every cable. A weak or undersized connection creates resistance, resistance creates heat, and heat causes fires, melted components, and catastrophic system failures.
This tutorial helps you build battery cables from scratch. If you’re a homeowner assembling an off-grid solar system, an RV adventurer upgrading factory wiring for a larger inverter, a marine enthusiast replacing corroded connections, or a mechanic looking to reduce custom cable costs, this tutorial is for you. Follow these steps to create cables with unusual lengths, hard-to-find gauges, or specific lug hole sizes.
This guide covers the full battery cable making process and shares the same tools and techniques we use to handcraft custom cables at Current Connected.
Want to skip the work and order custom cables instead? Click the banner below to start shopping!

Required Tools and Materials:
- Tape measure
- Marker
- Knife or razor blade for cutting the insulation
- Heat shrink tubing
- Battery cables
- Correctly sized lugs (2AWG, 1/0, 2/0, 4/0)
- Hydraulic crimping tool
- Wire cutters
- Heat gun
Video Tutorial
How To Crimp Heavy Gauge Battery Cables
Detailed Steps
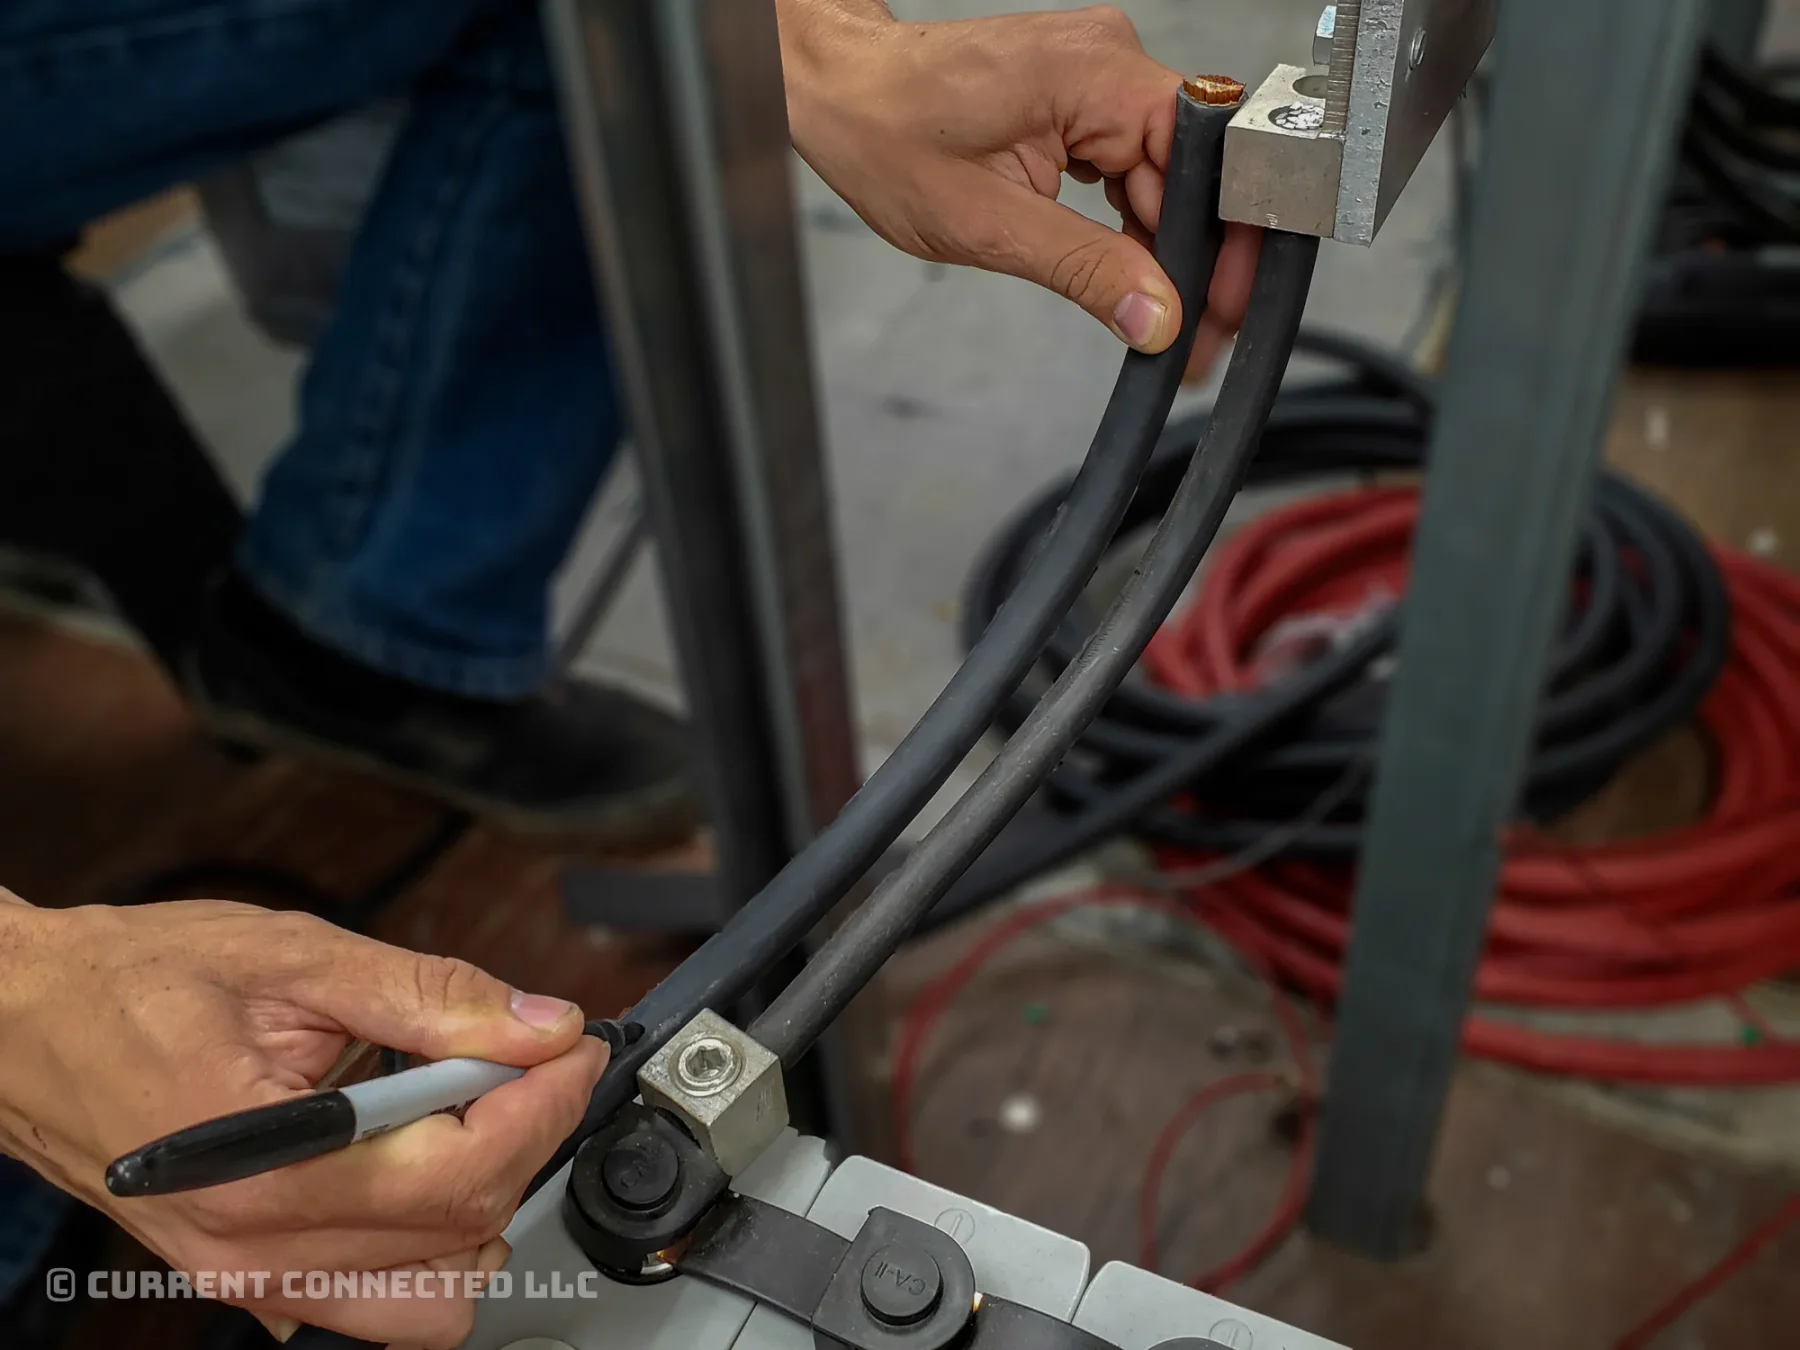
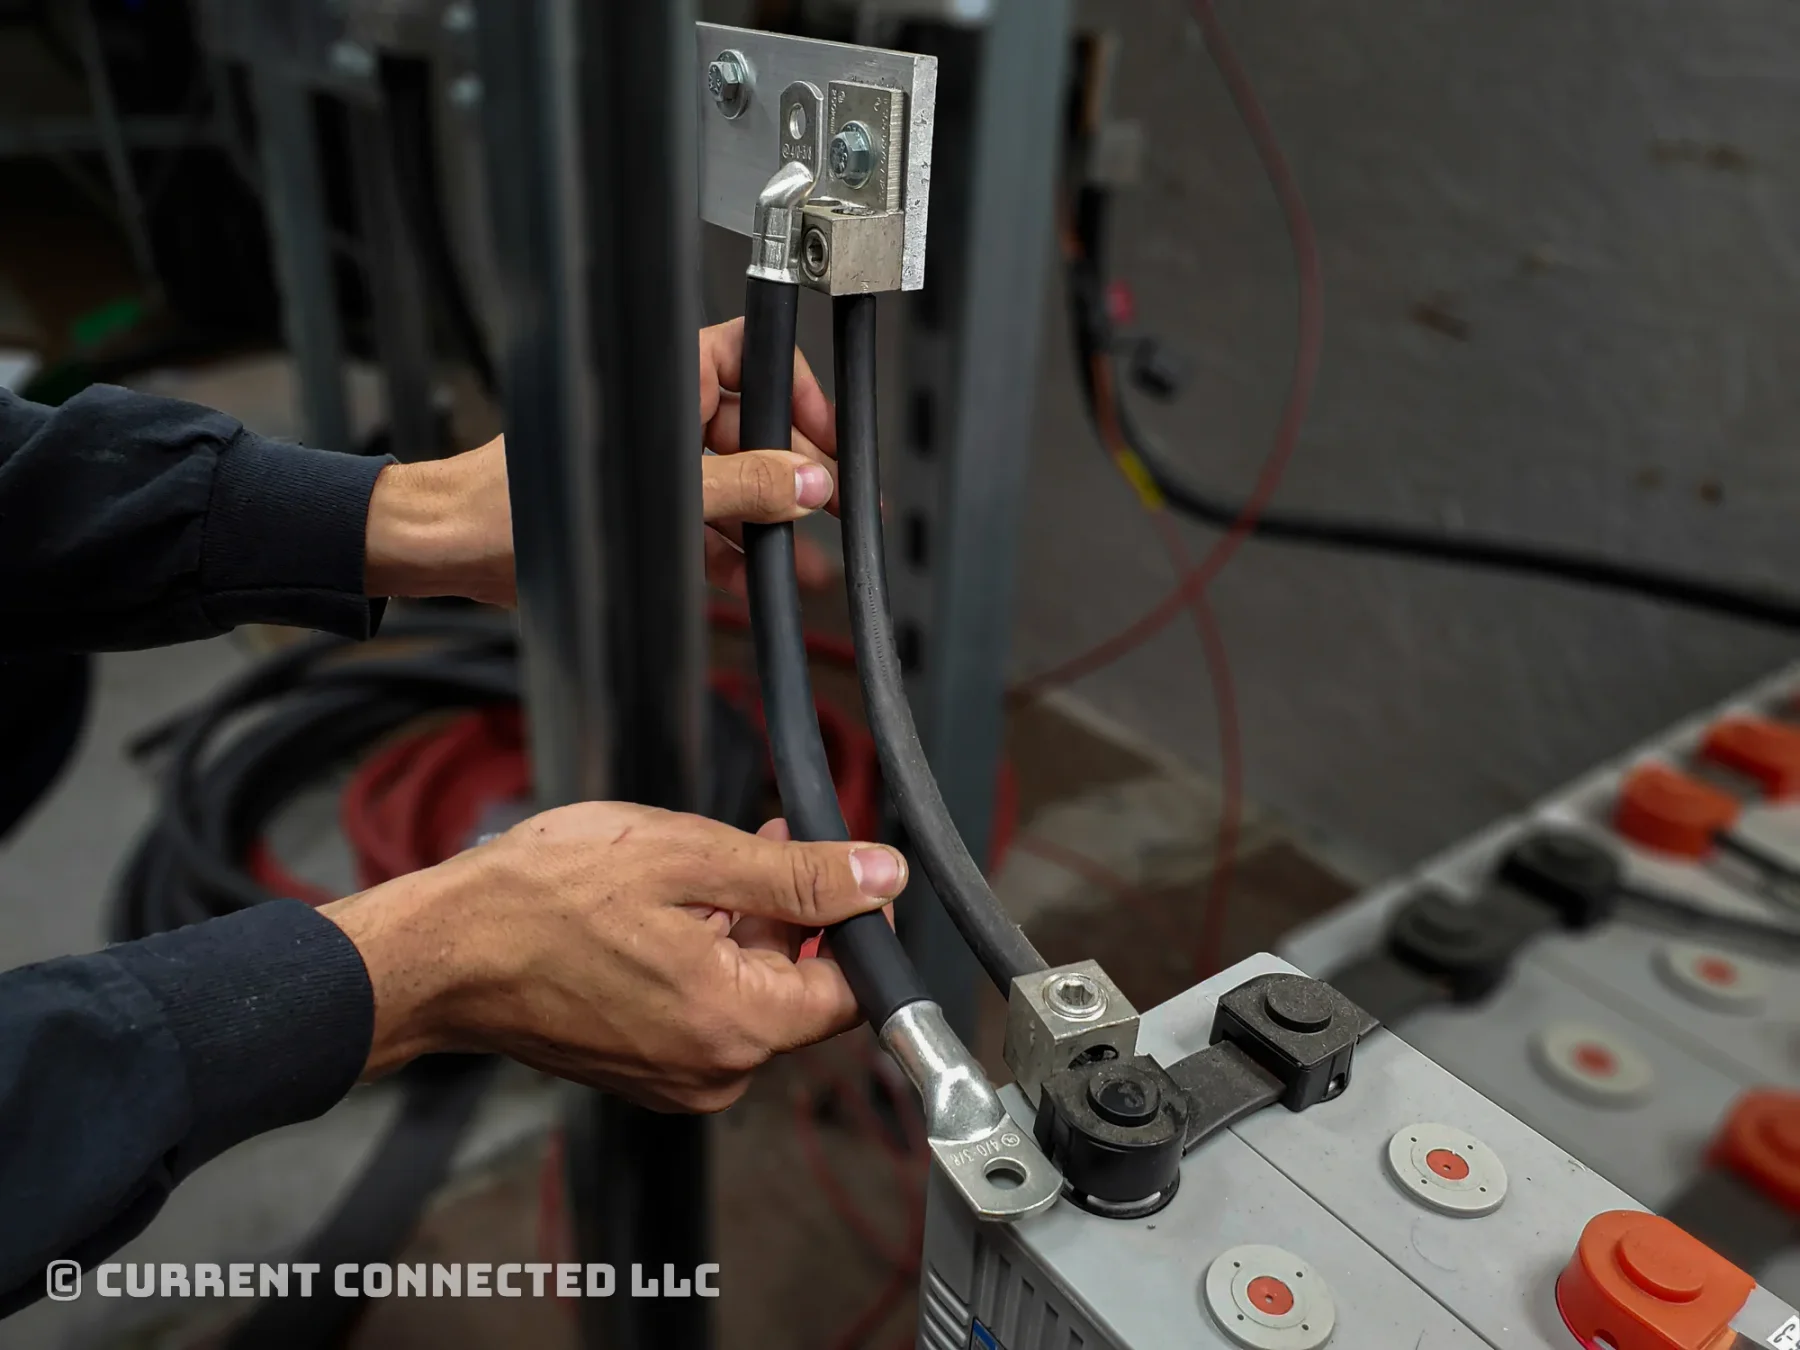
Step 1: Determine Cable Length
Determine how much cable you need. Plan the run from point A to point B and include any additional lug length. Mark the length.
TIP
Mount the empty lugs on the final connection points and run the cable between them.
You can alternatively use a tape measure.
WARNING
Metal tape measures can cause a safety hazard when used near batteries of any kind.
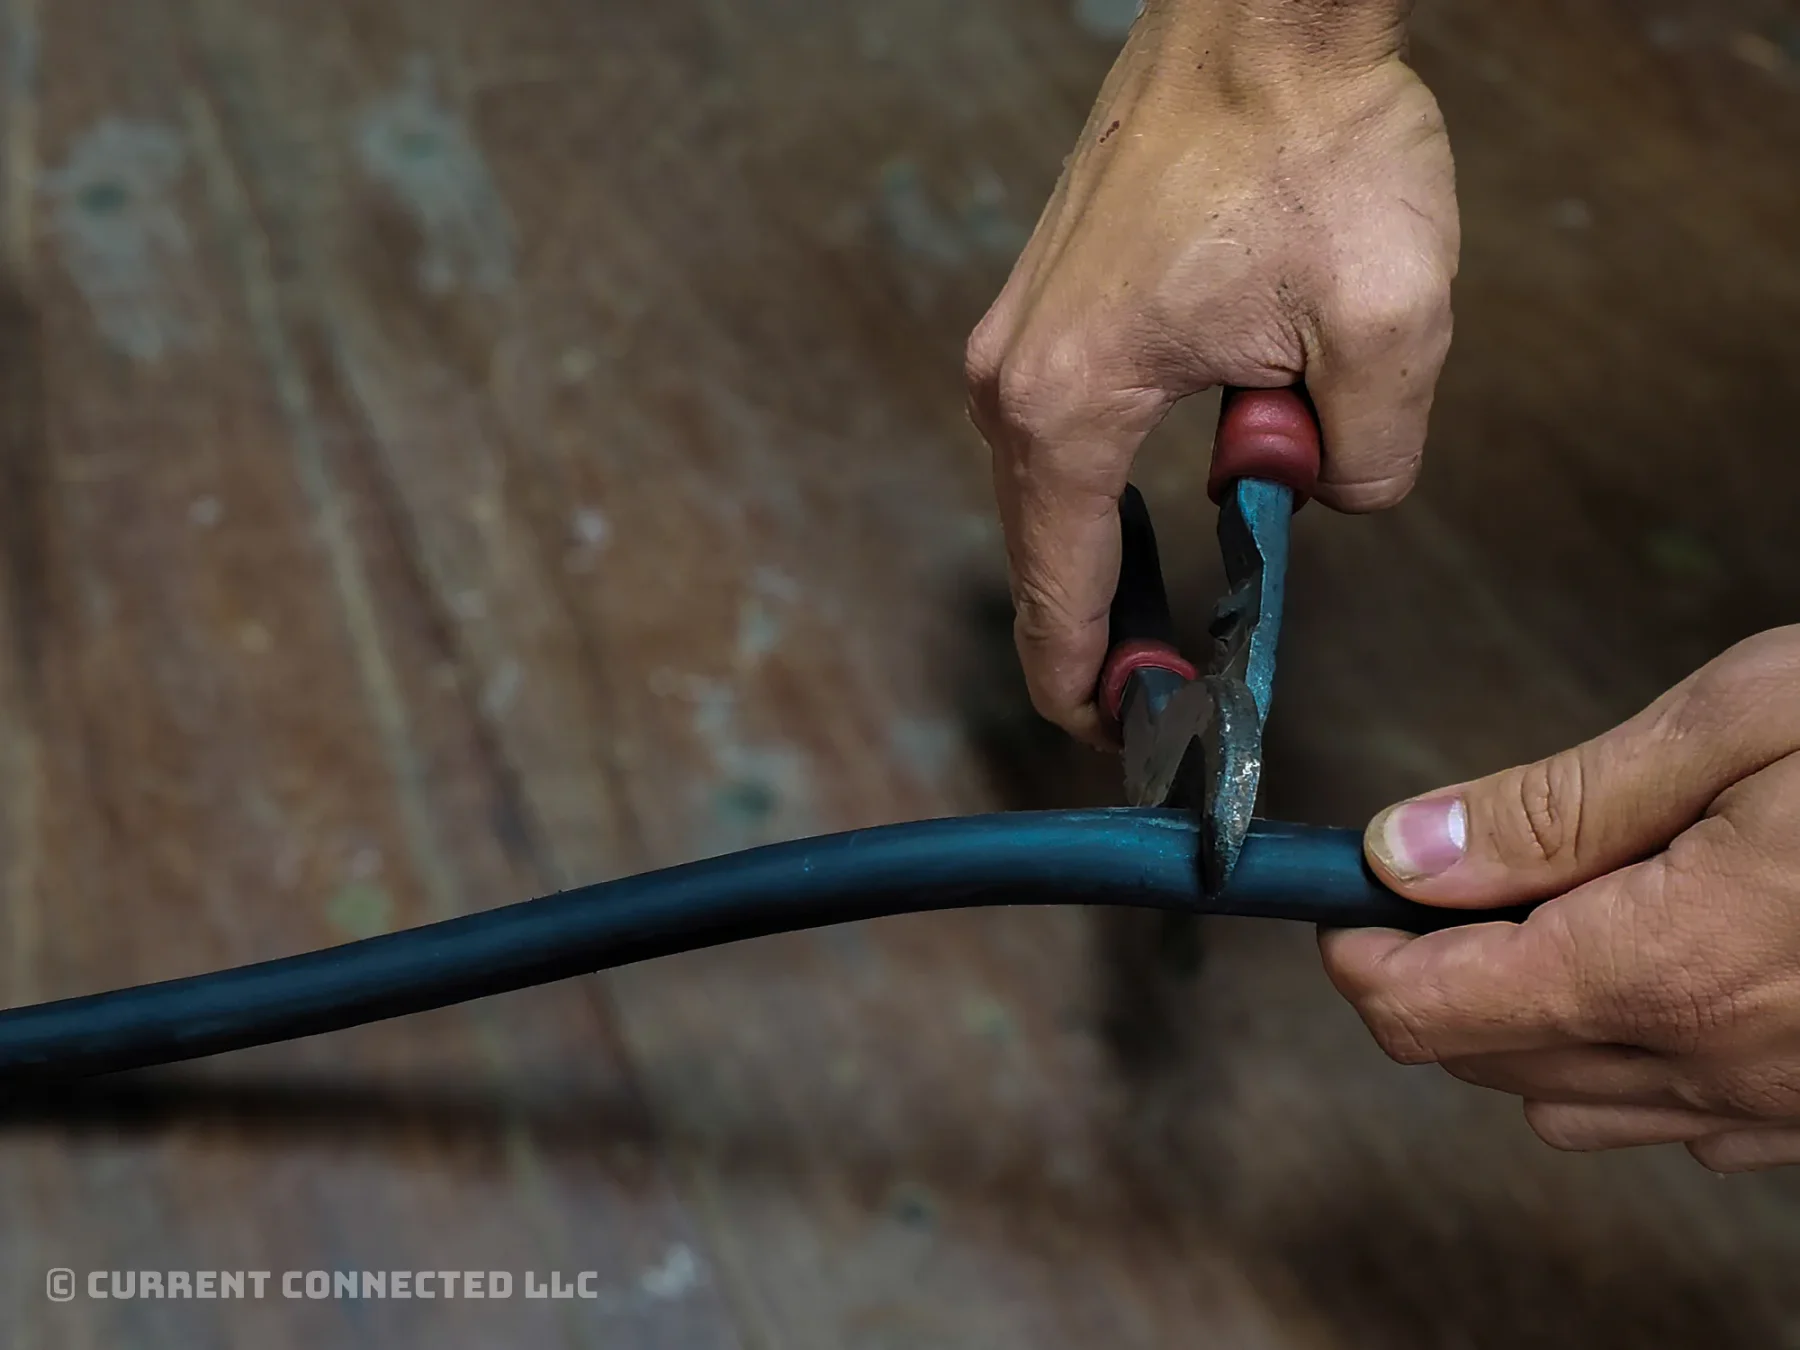
Step 2: Cut to Length
Cut the cable at the marked length.
Here at Current Connected, we use Klein Journeyman cutters for our custom battery cables. We've found they work well for most cable sizes, even those outside their specified range.
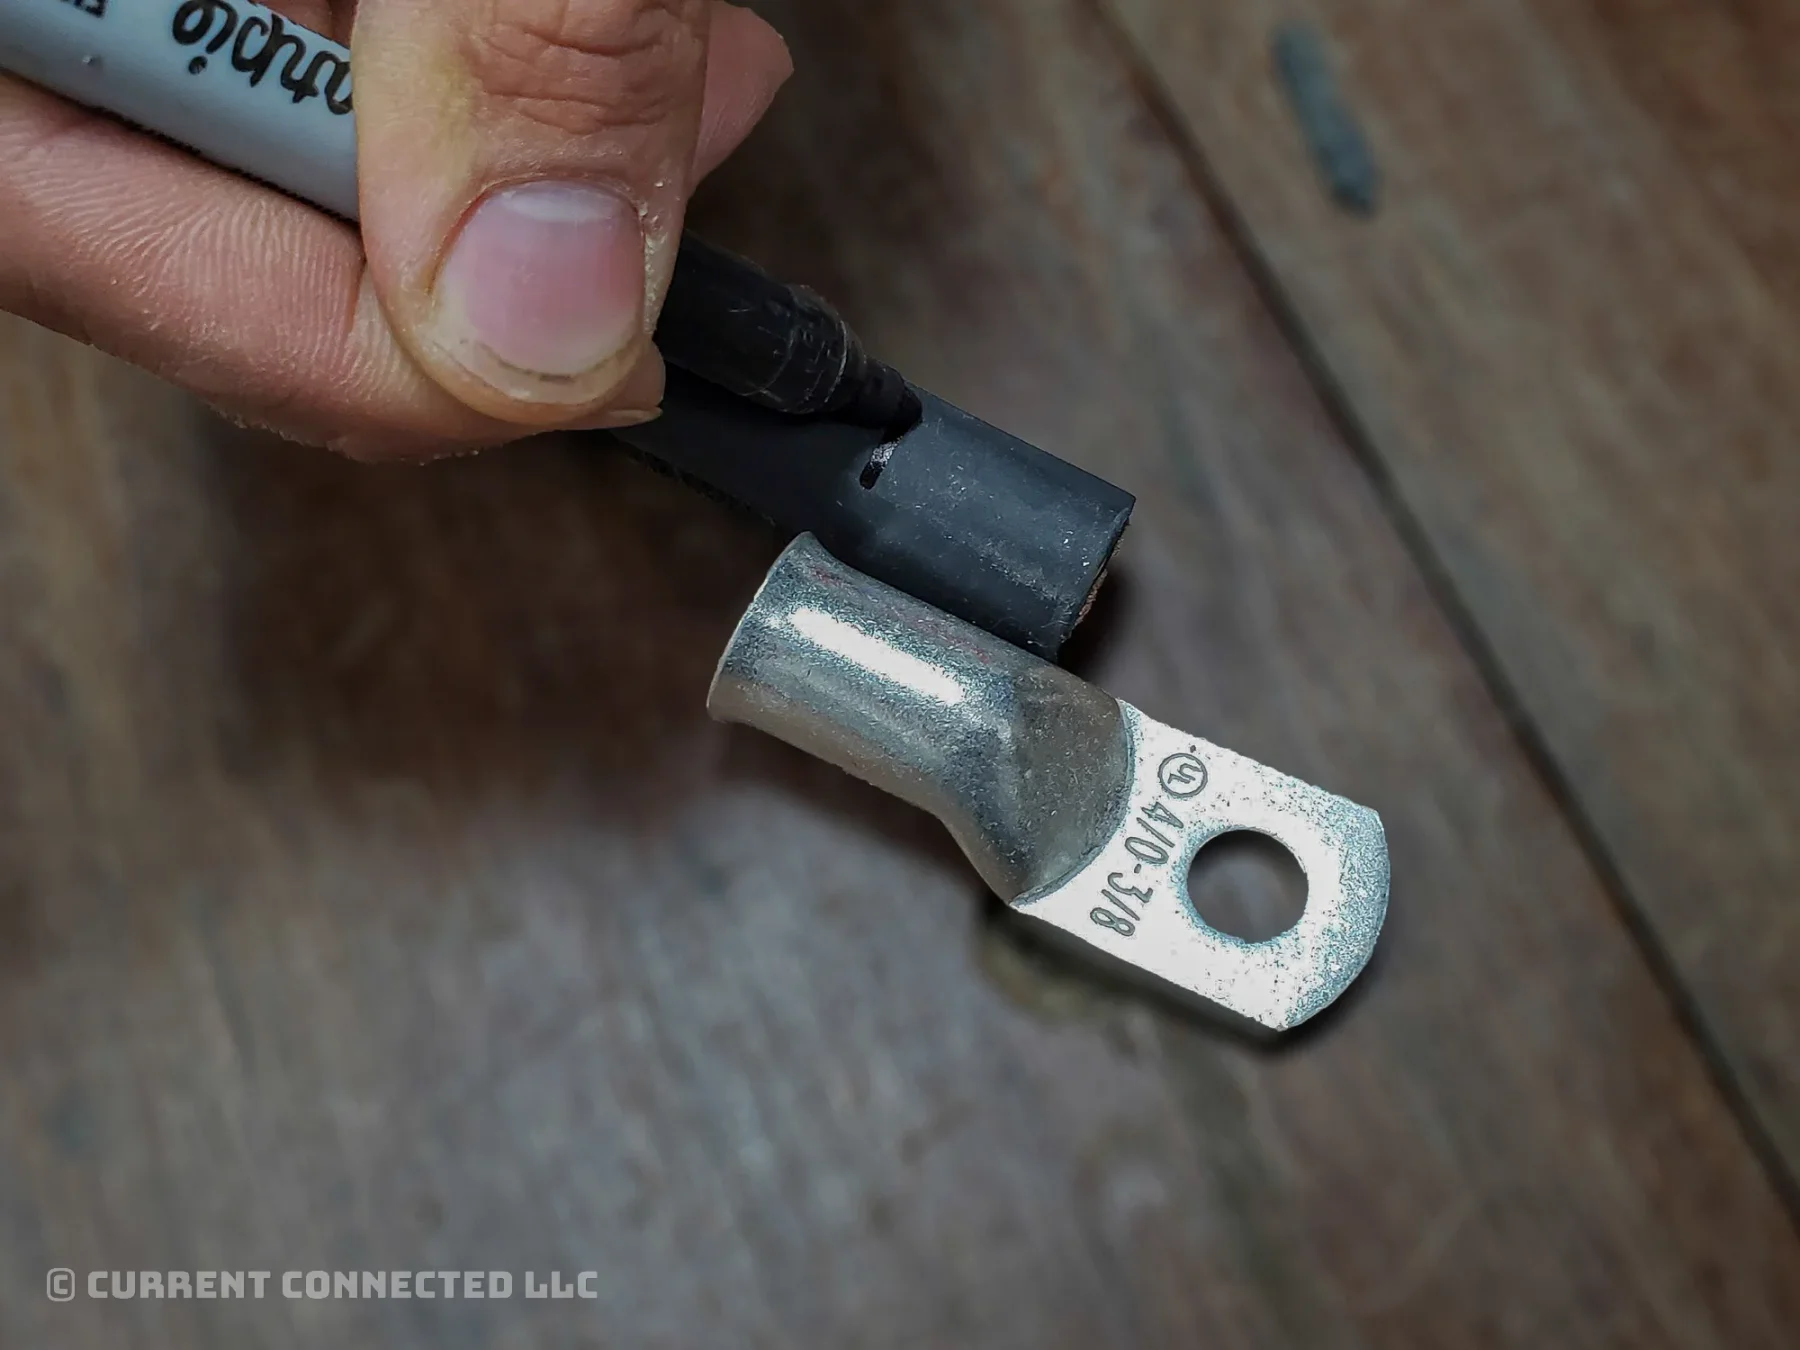
Step 3: Mark Insulation Strip Length
- Place the wire next to the lug.
- Line up the cable's raw end with the lug's closed end where the lug starts to taper.
- Mark the insulation where the lug's open end flares out.
TIP
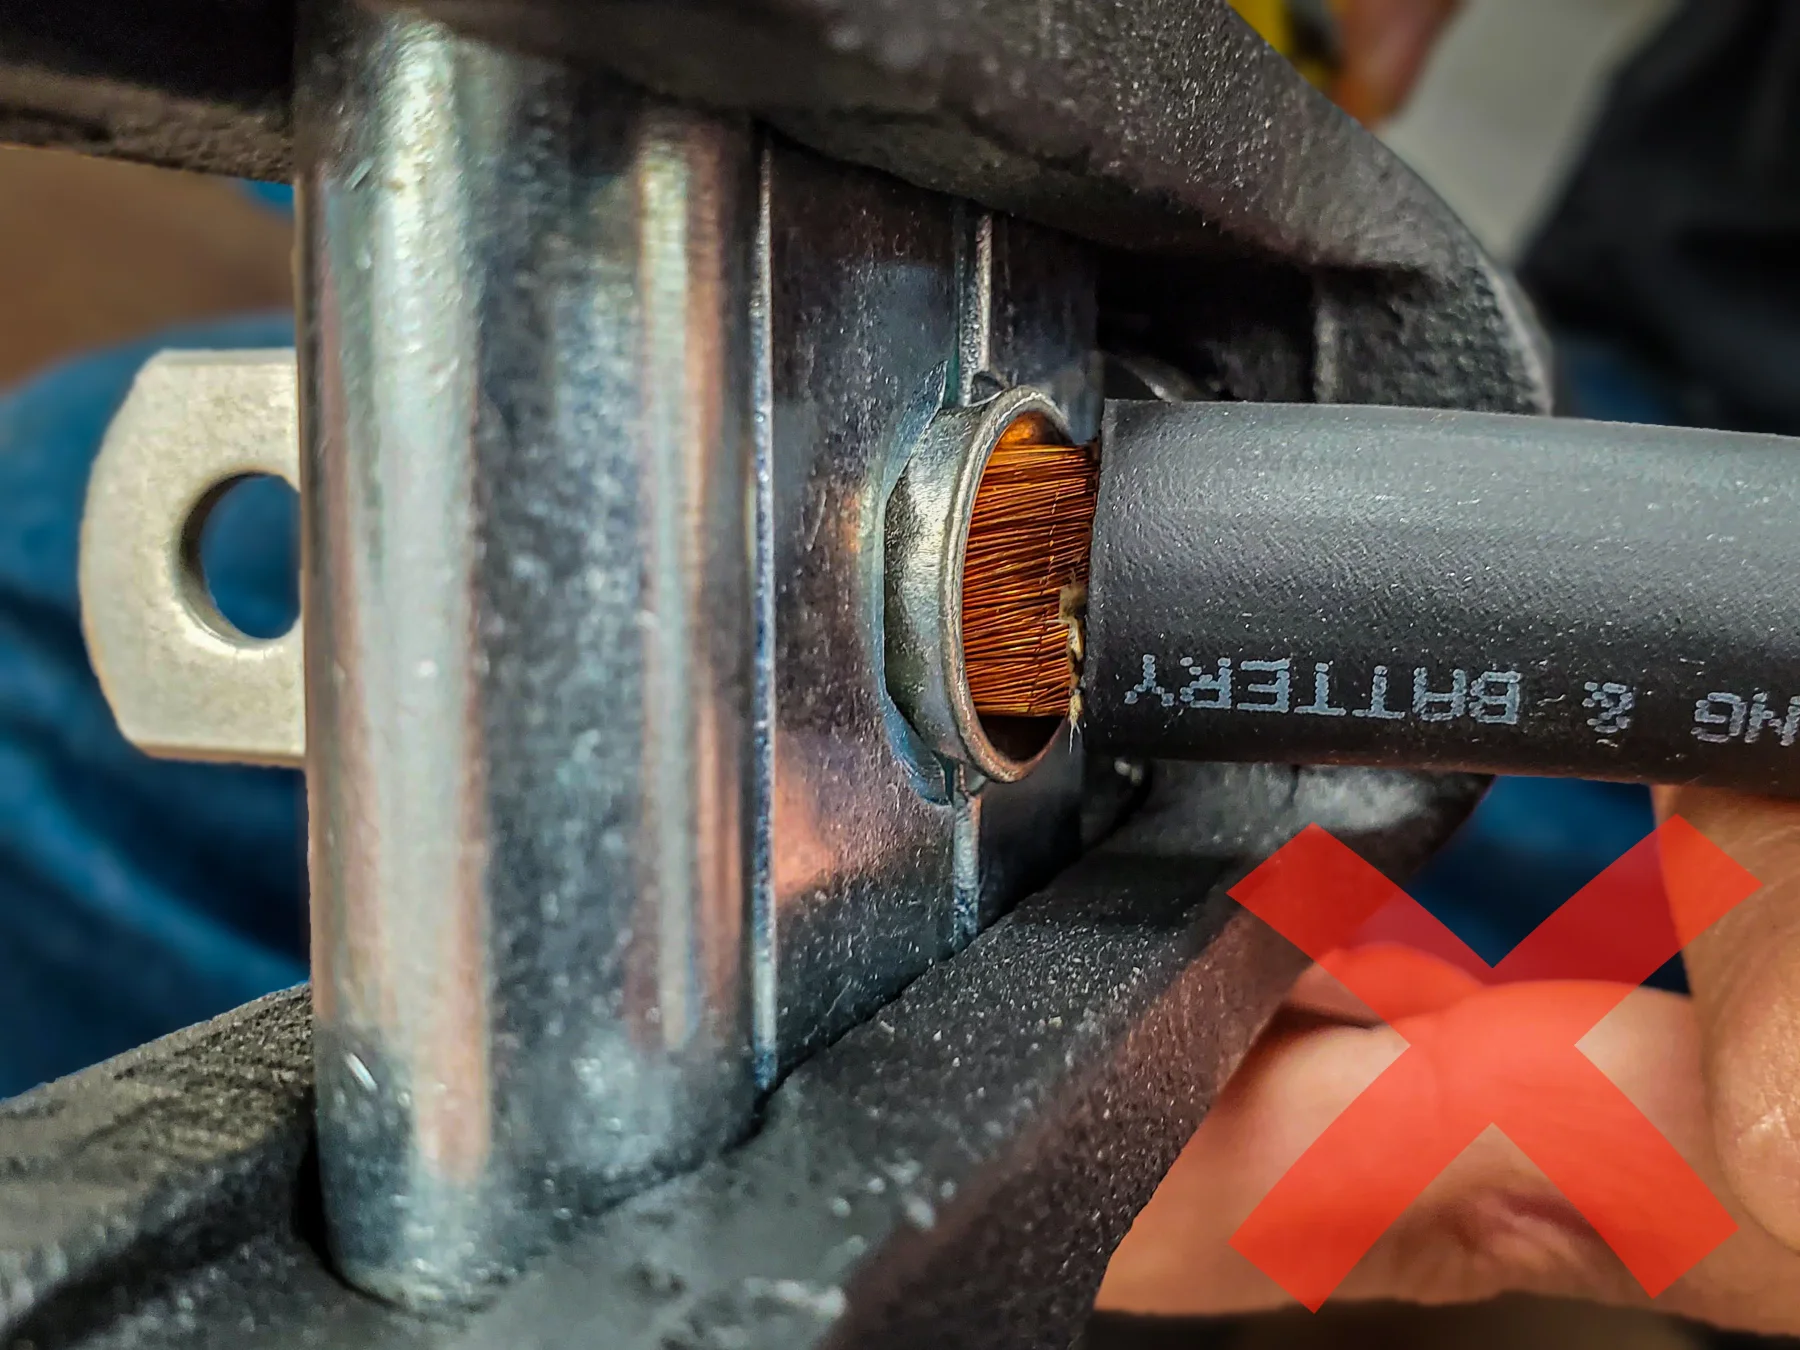
The final cable slides into the lug as far as possible without any copper showing outside the lug. The insulation presses against the lug to conceal all copper.
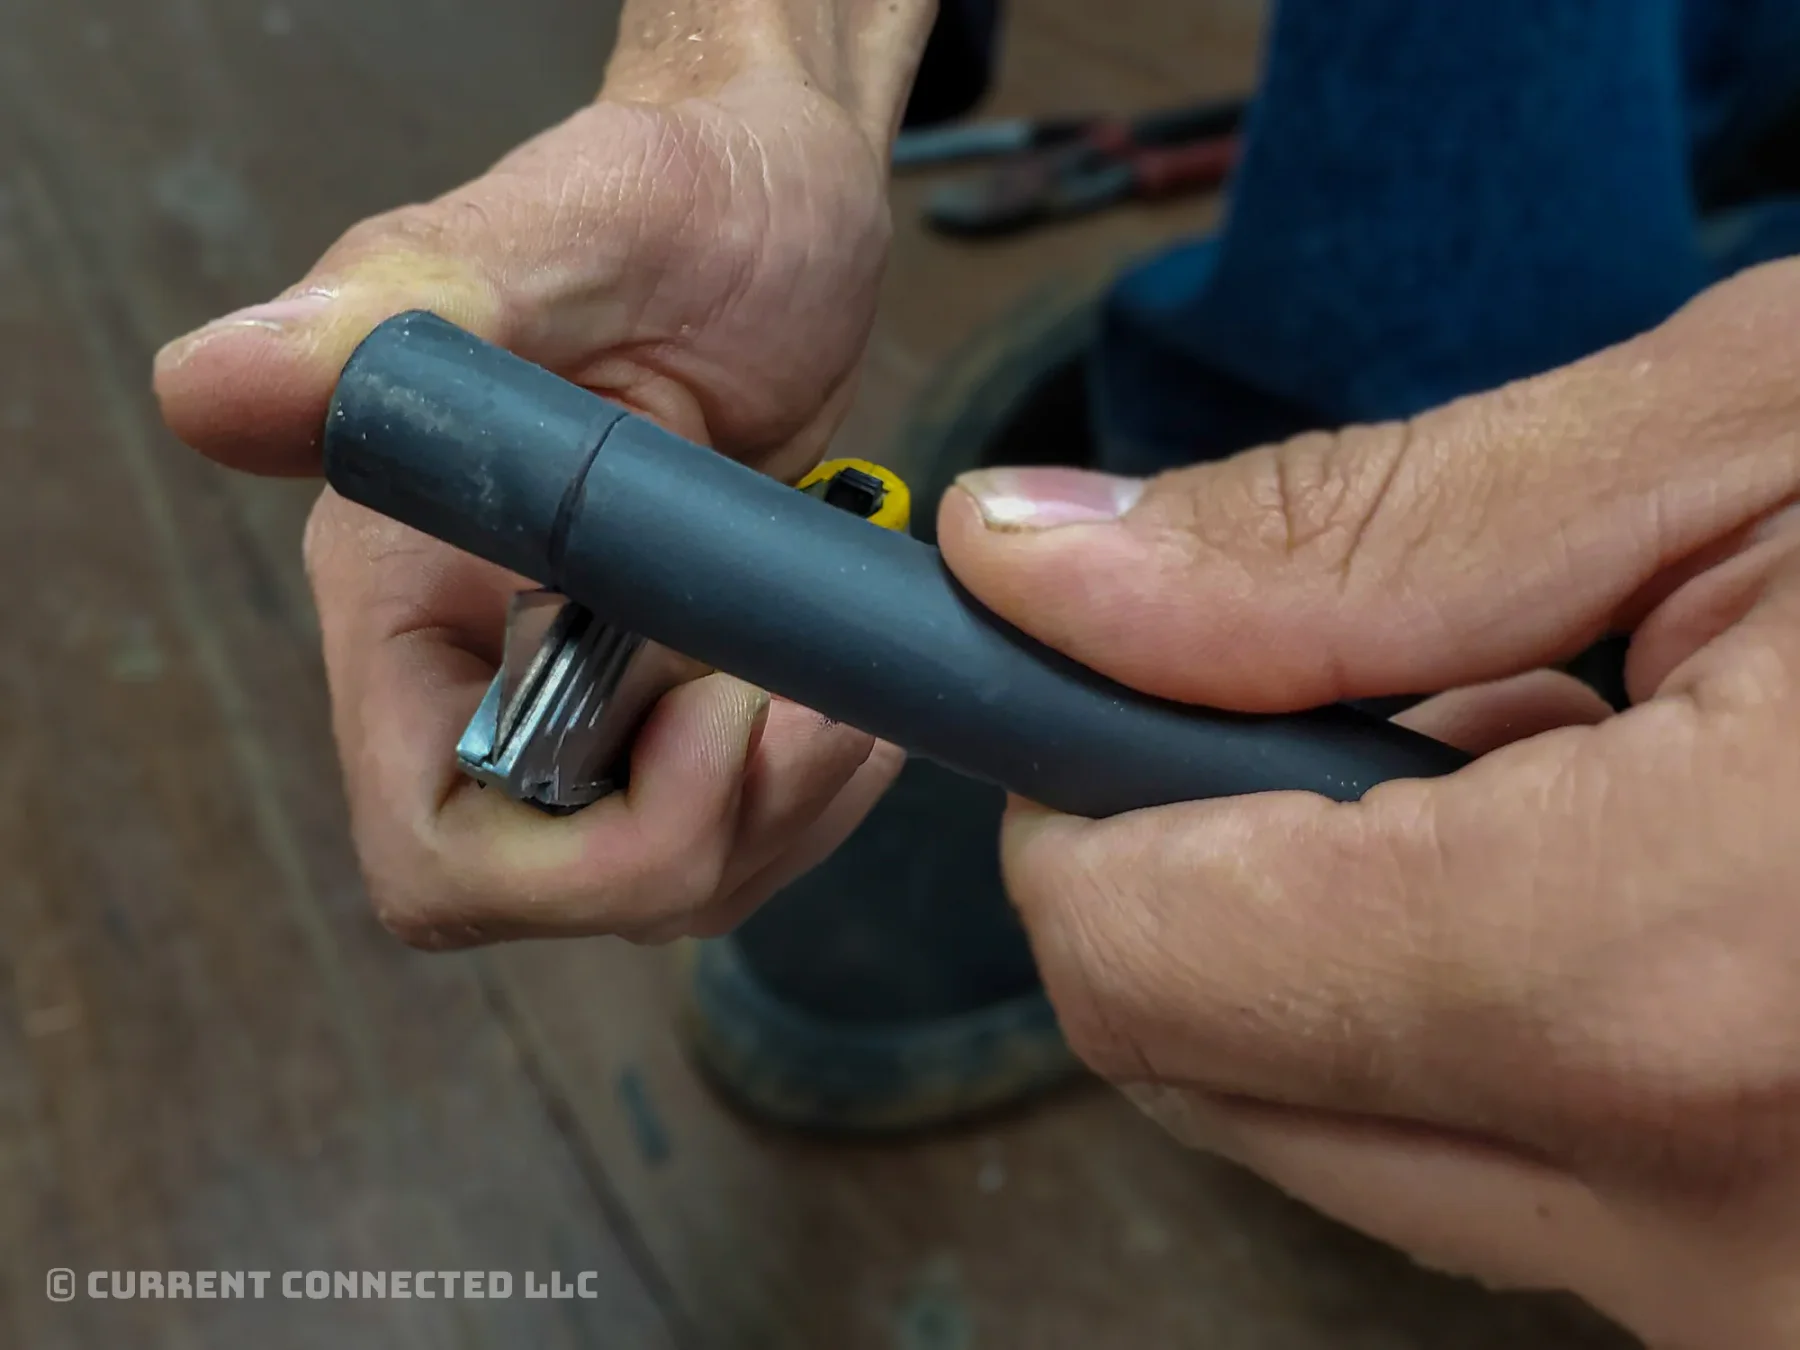
Step 4: Strip the Insulation
Use a sharp knife to cut 3/4 of the way through the rubber insulation.
WARNING
Do not cut all the way to the copper. It is extremely soft, and it's easy to nick the strands with a knife. Damaged copper can create a weak spot and lead to future failure. This is especially true of smaller gauges with finer strands.
NOTE: Conventional wire strippers, side-cutters, and cable cutters cannot properly strip battery cable insulation.
Step 5: Remove the Insulation
- Bend the wire at the score line. The insulation should snap.
- If the insulation doesn't separate, touch it lightly with the knife while bent.
- Once separated, pull the insulation off.

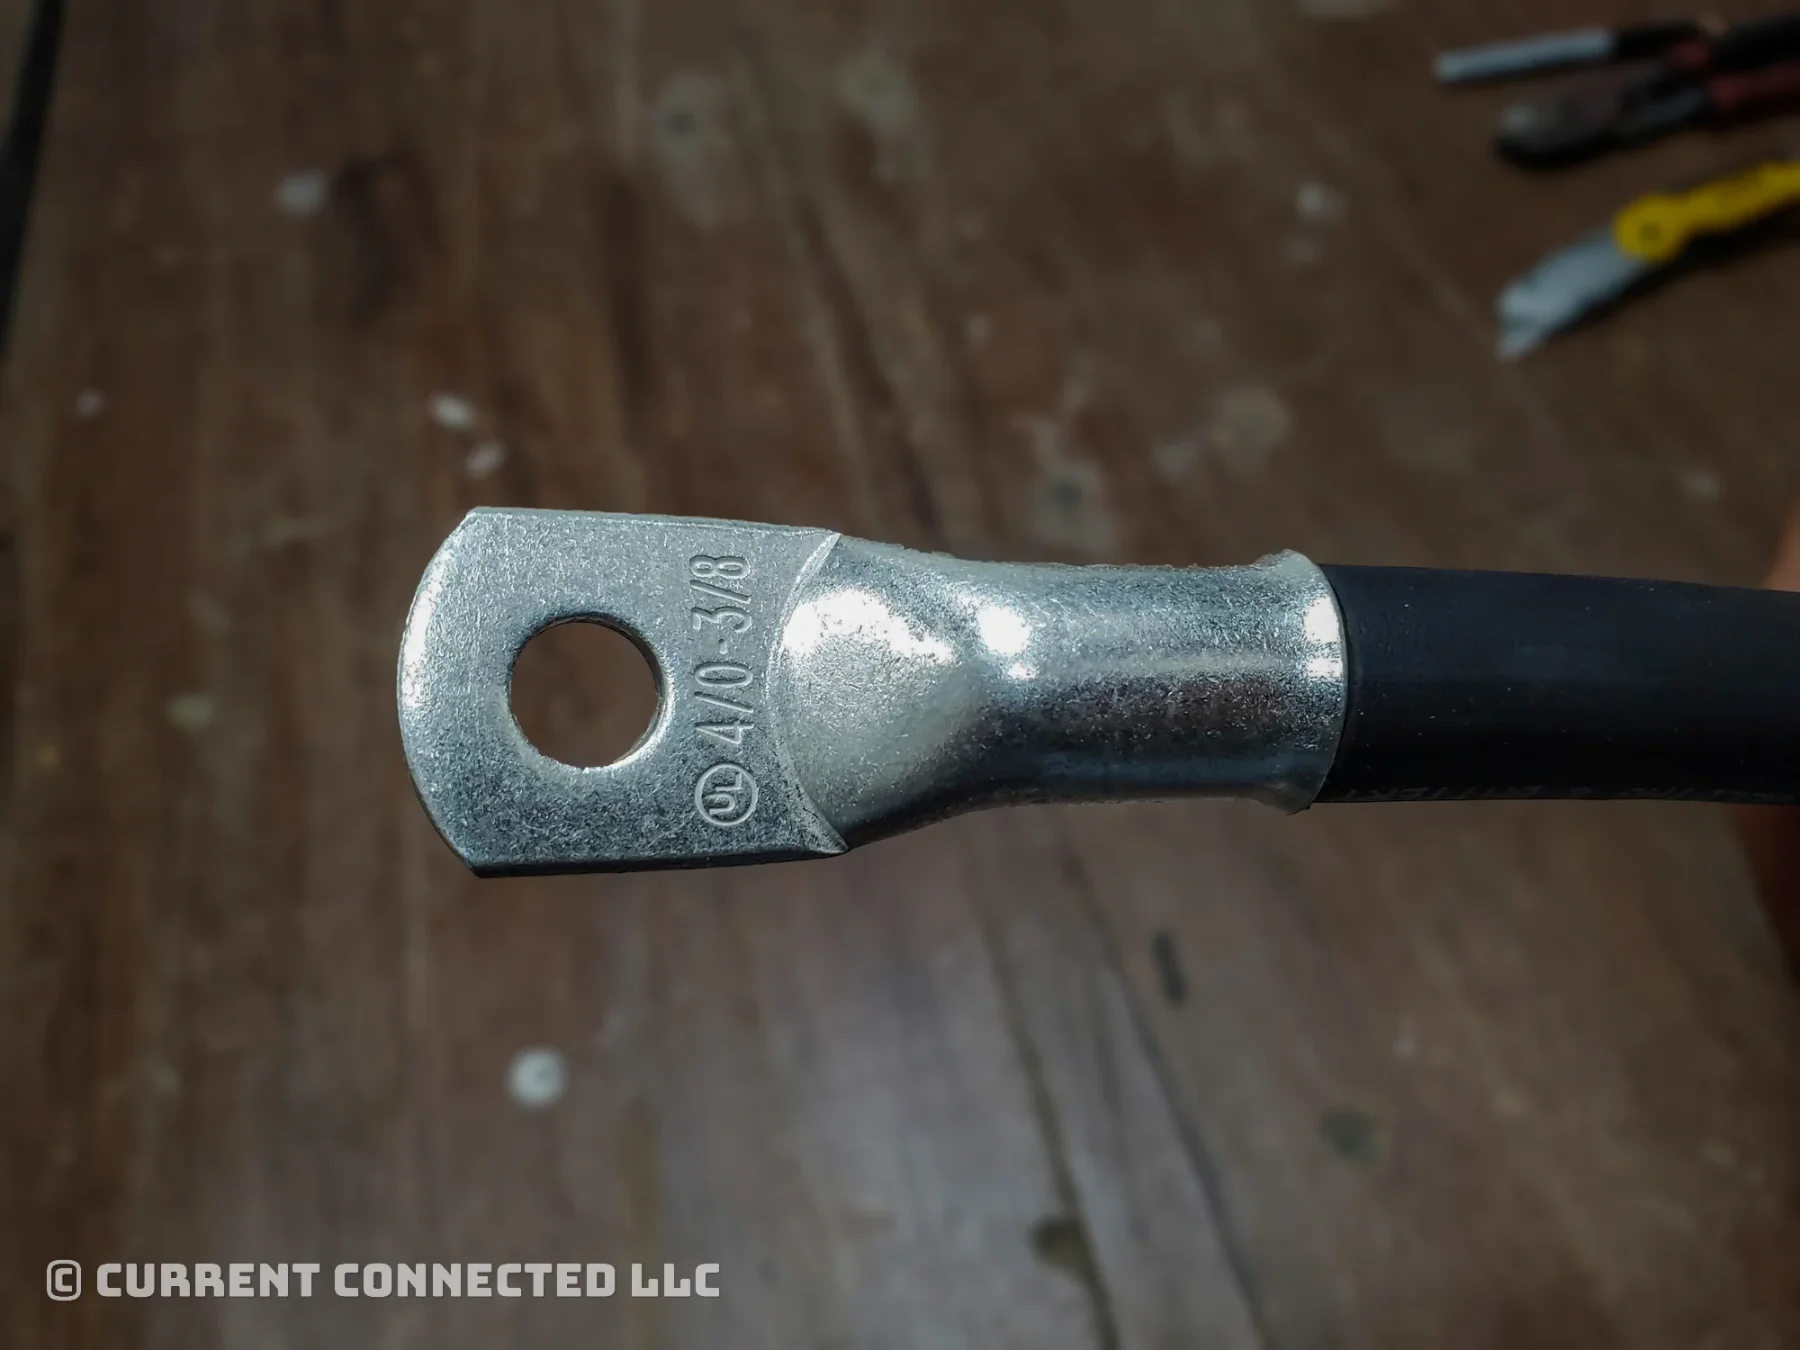
Step 6: Insert Wire and Ensure Correct Fit
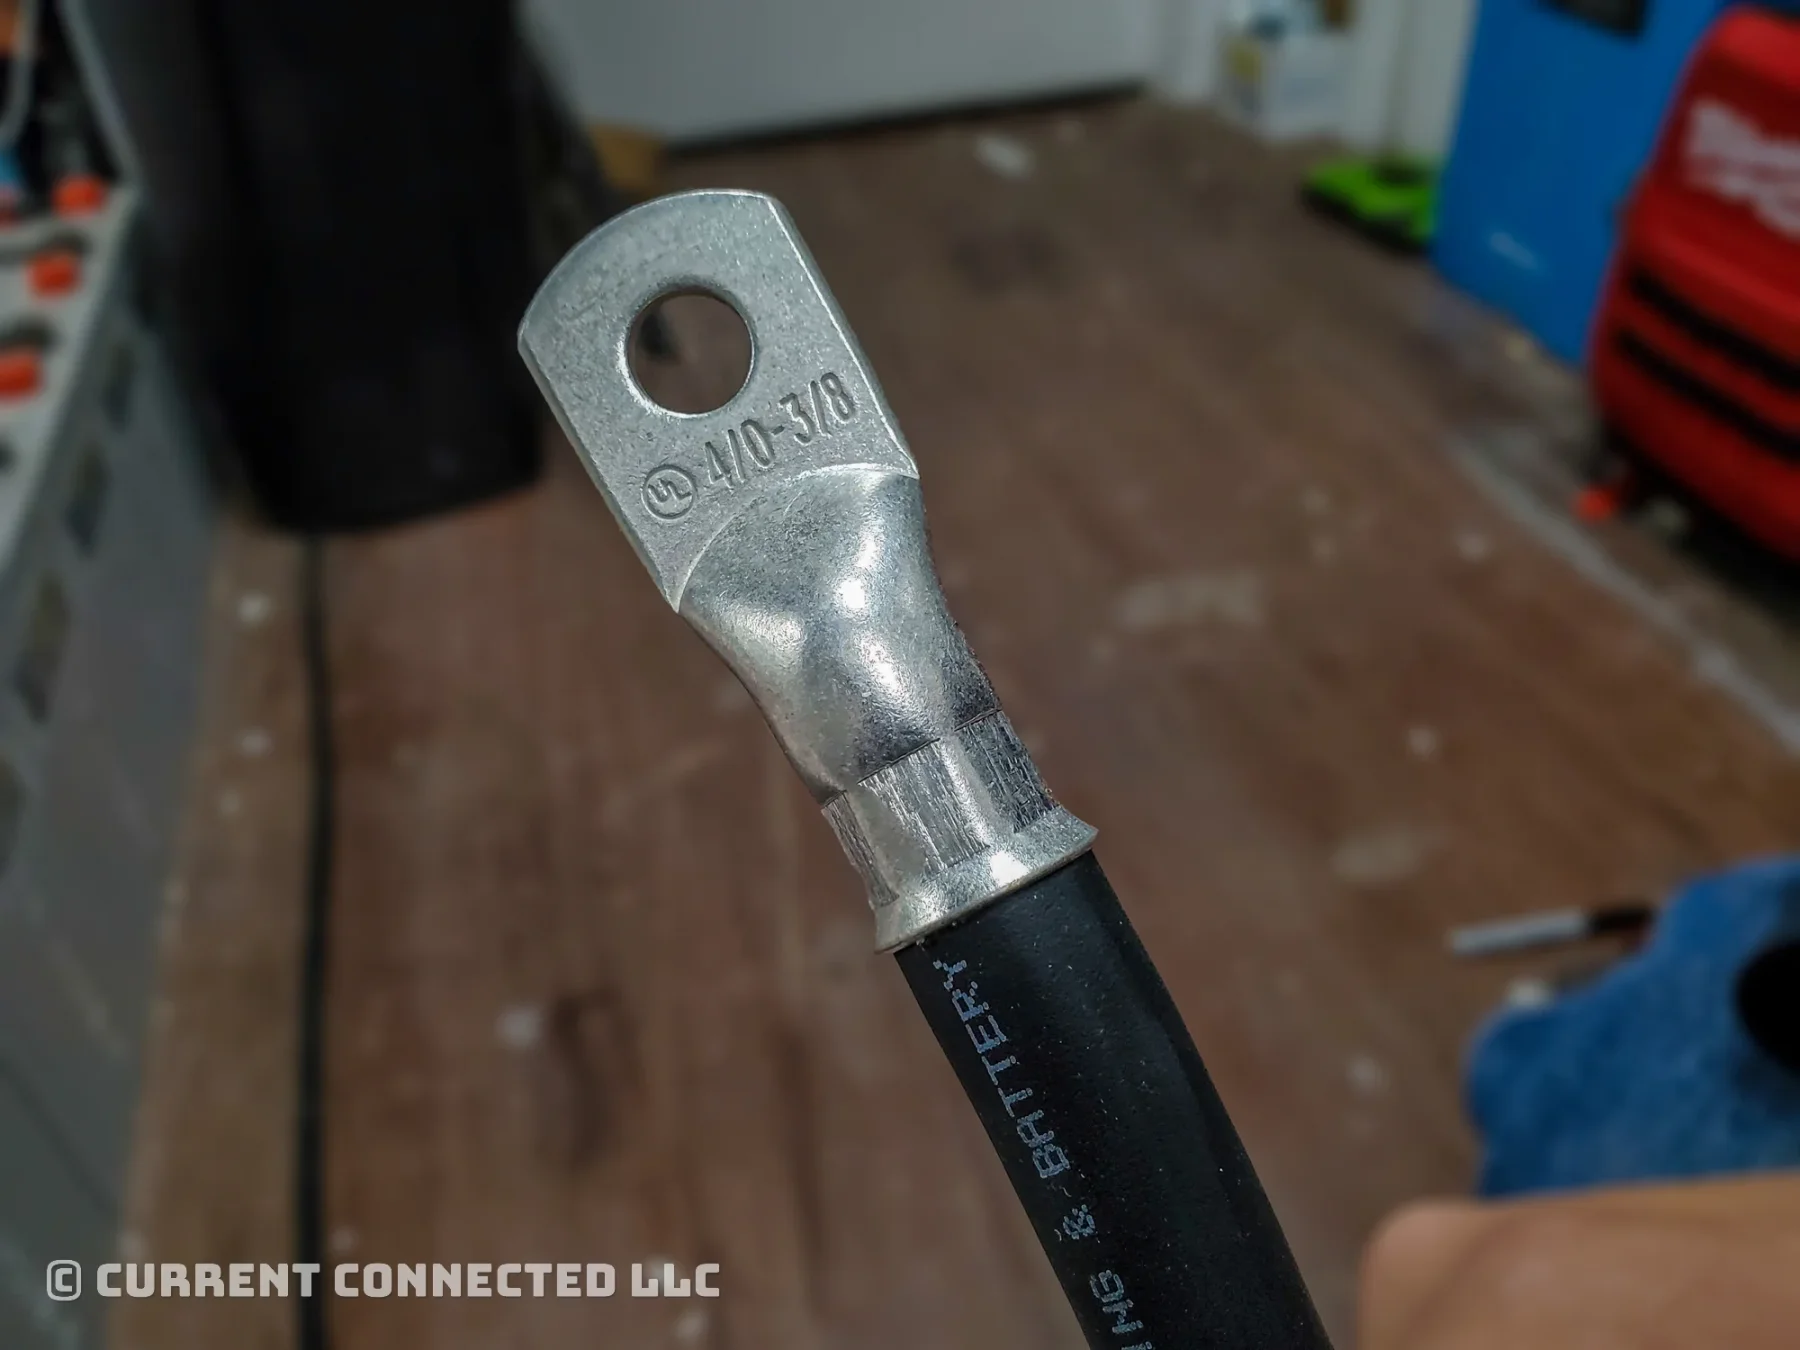
- Select a lug. The lug must be the right size and without defects or oxidation.
WARNING
Lug oxidation can lead to heating and catastrophic failure. If you cannot find a lug without oxidation, scrub it clean with fine-grit sandpaper before use.
- Slide the lug over the stripped end and make sure there is no exposed copper.
Step 7: Prepare Crimper
Install the correct die for your wire size and close the release valve.
TIP
We recommend the Temco Crimper because it has the proper dies for AWG sizes. The correct die provides the strongest connection and stamps the die size into the lug.
Find the Temco Crimper here.

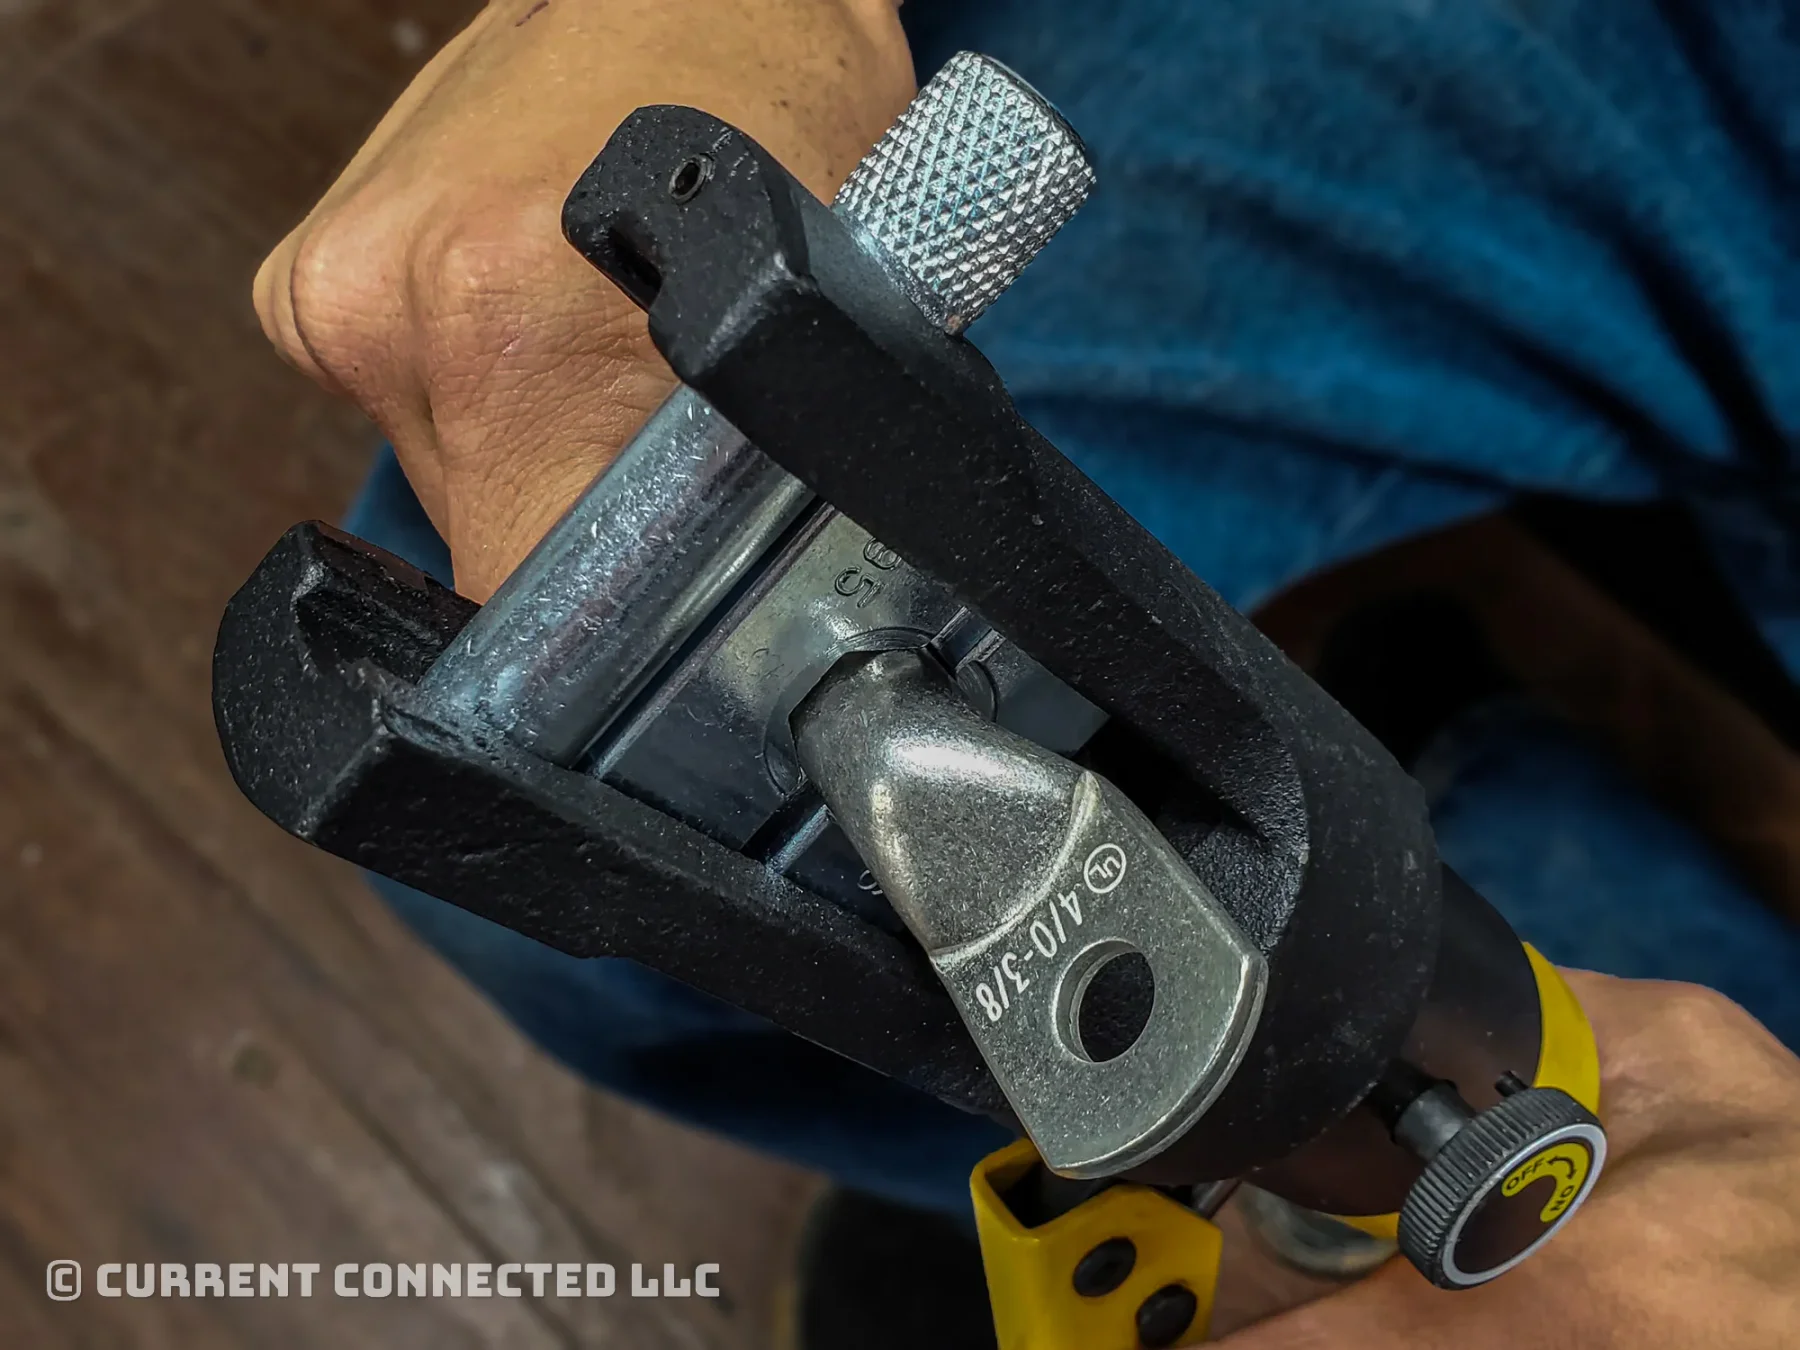
Step 8: First Crimp
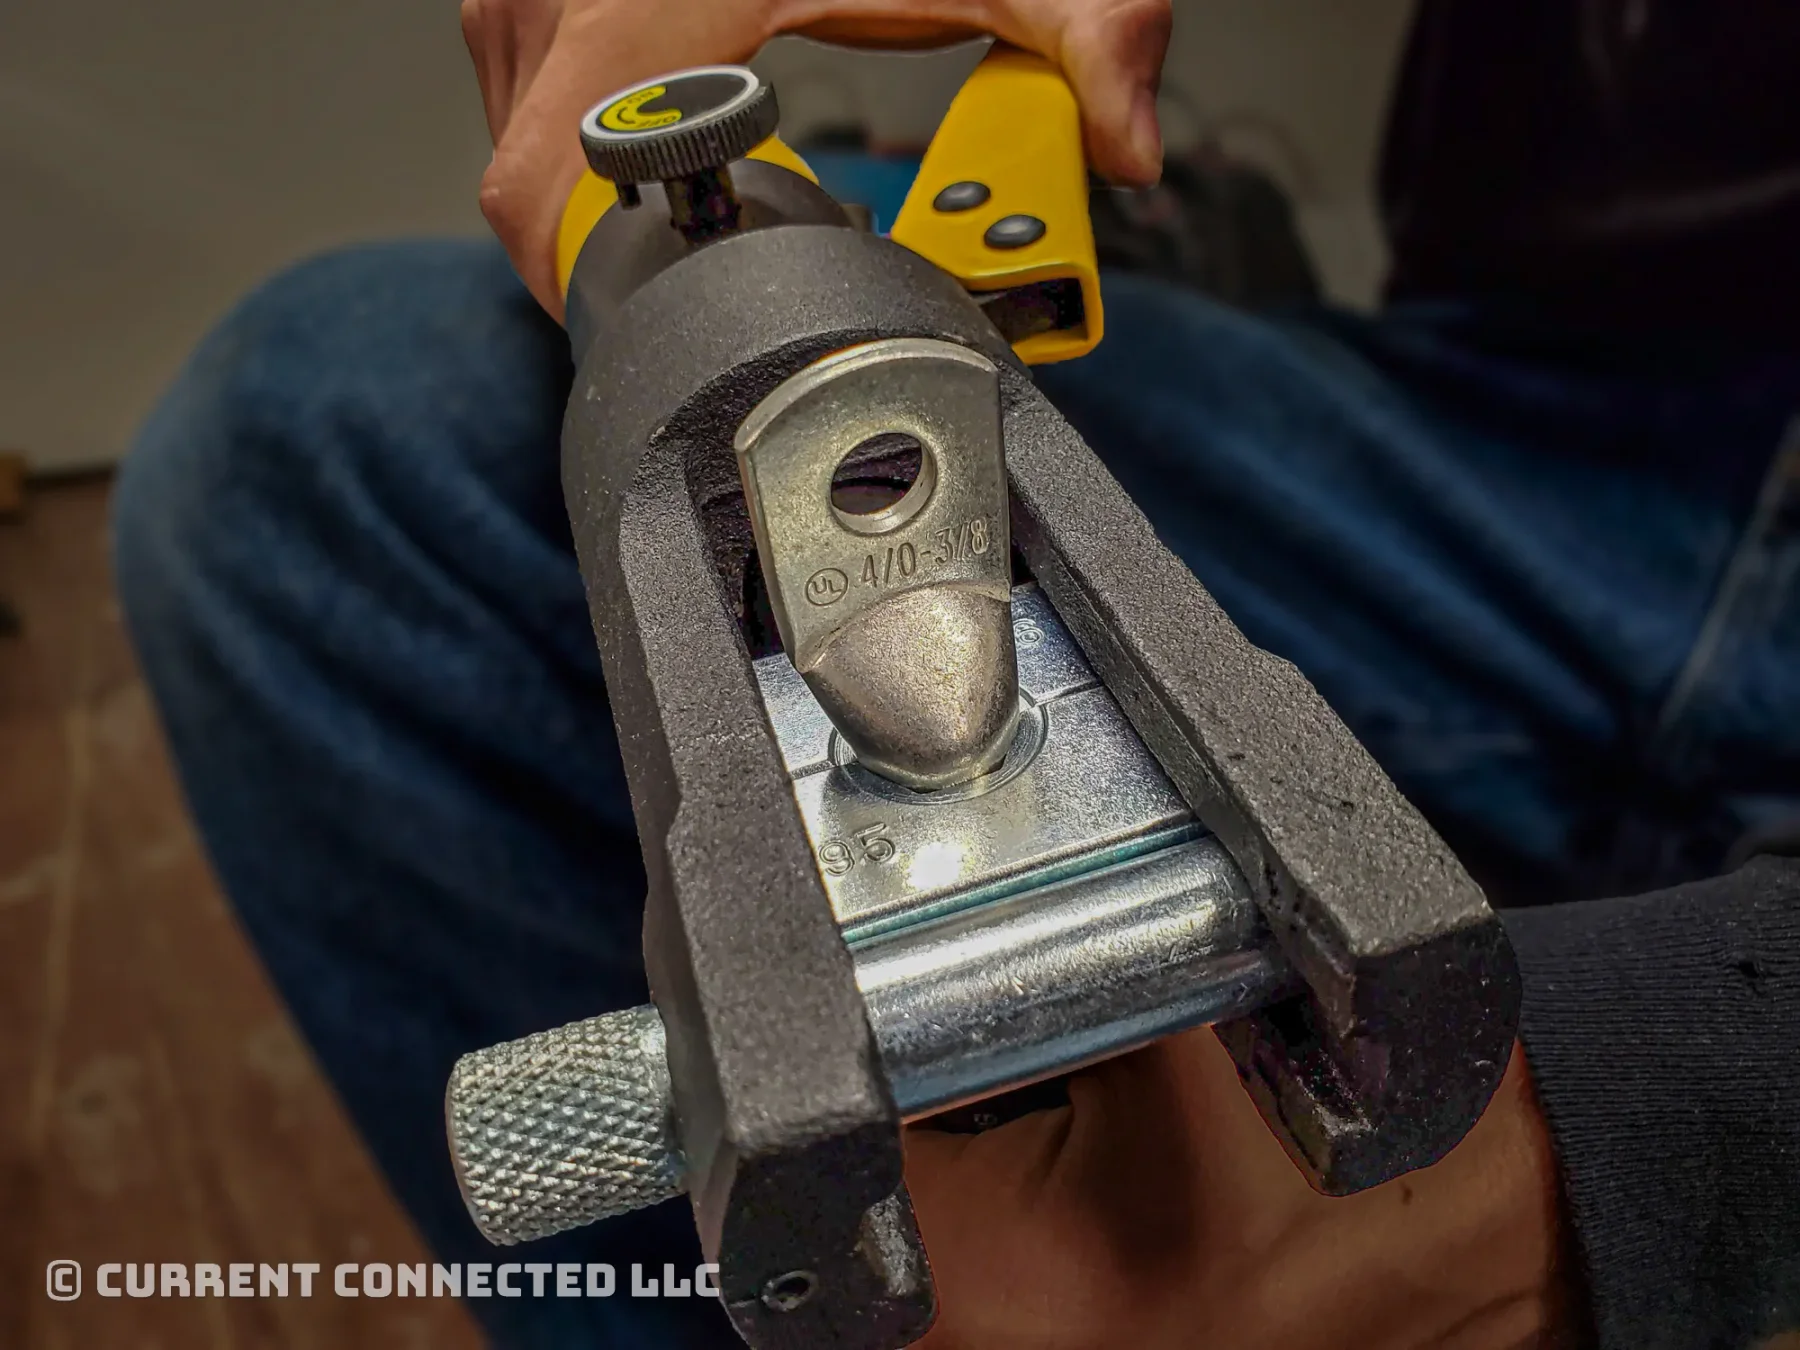
- Place the lug into the dies.
- Orient the lug as shown in the picture.
- If your lug is big enough to need two crimps, align the die as close as possible to the open end of the lug.
- Pump the handle a few times to snug the grip.
- Insert the wire. Make sure no copper shows past the end of the lug.
- Crimp the wire and make sure the copper stays fully inserted.
Be careful as you crimp!
Make sure the wire is fully inserted while you crimp the cable. Failure to do so can cause electrical hazards.
Keep pressure on the wire while crimping.
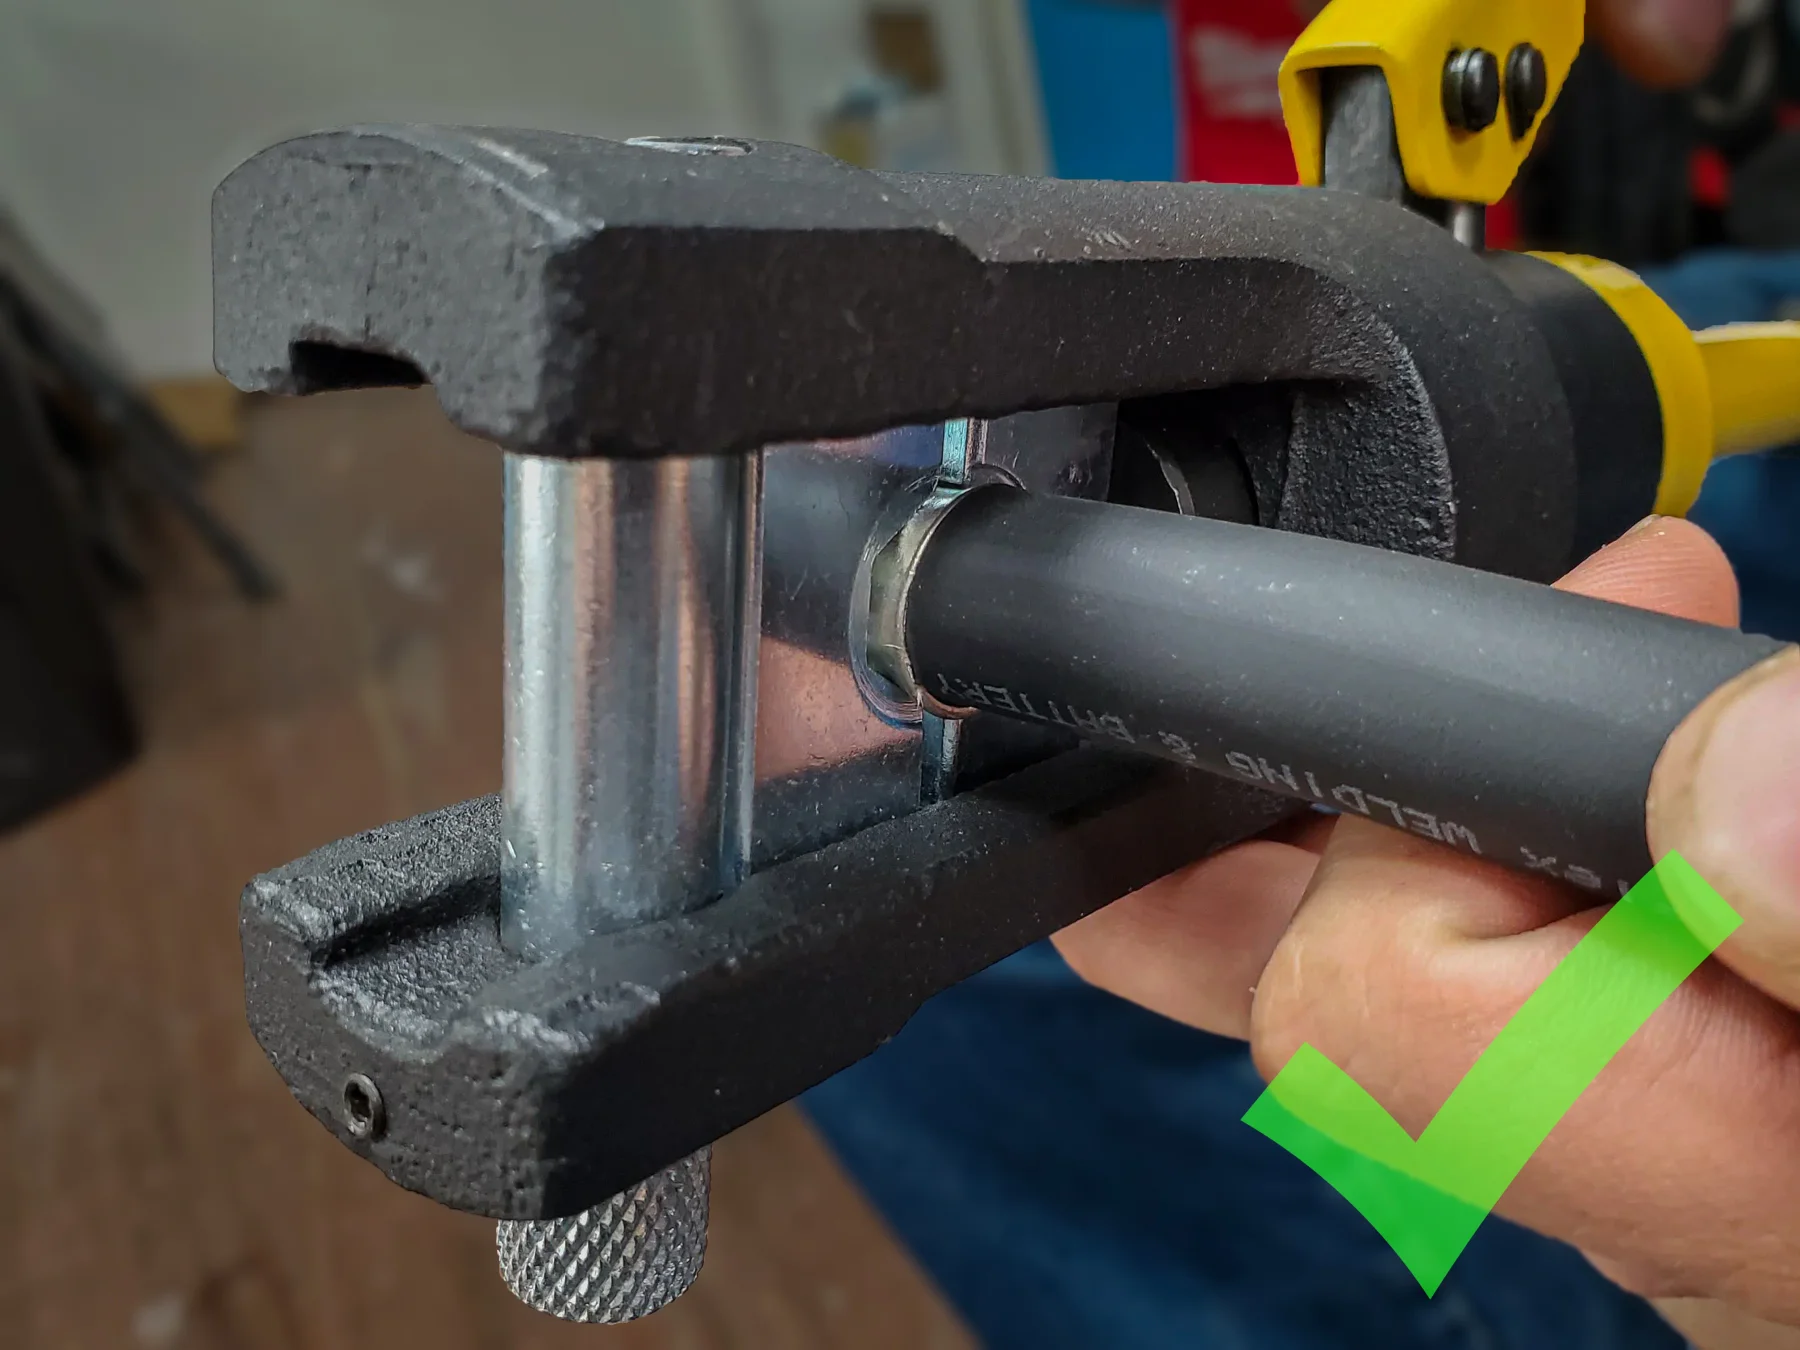
Step 9: Finish Crimping
- Crimp the cable until the dies touch.
- Remove the cable from the crimping tool and inspect the connection. Tug the lug to make sure it stays on the cable. If the lug slides off the cable, your die is too big. If the sides of the crimp where the dies meet looks smooshed out, your die is too small.
Step 10: Second Crimp (If Needed)
- Place the lug back into the crimper. Align the lug as before, but with the die covering the un-crimped area.
- Crimp the cable and test it as before.
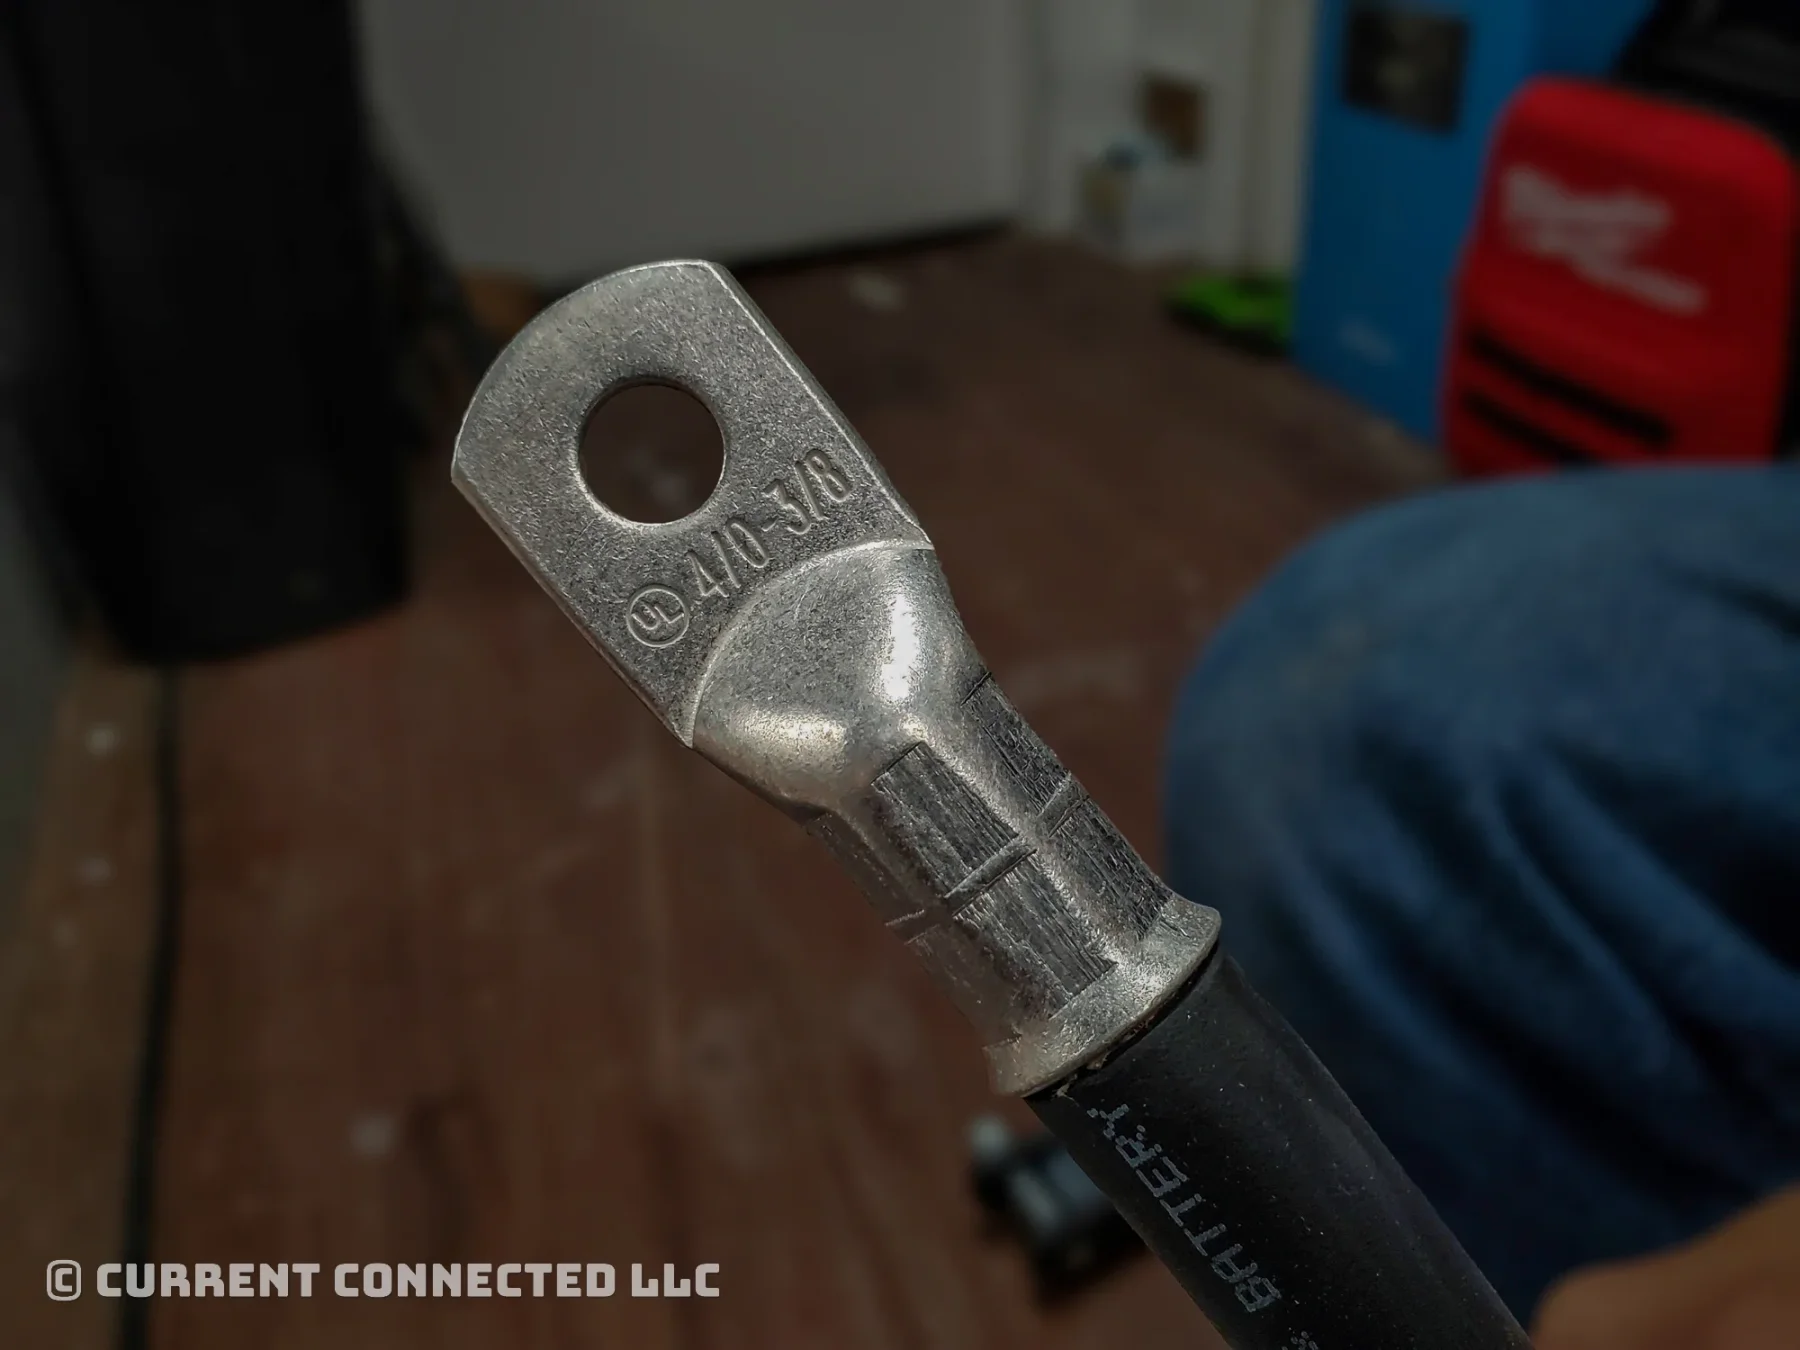
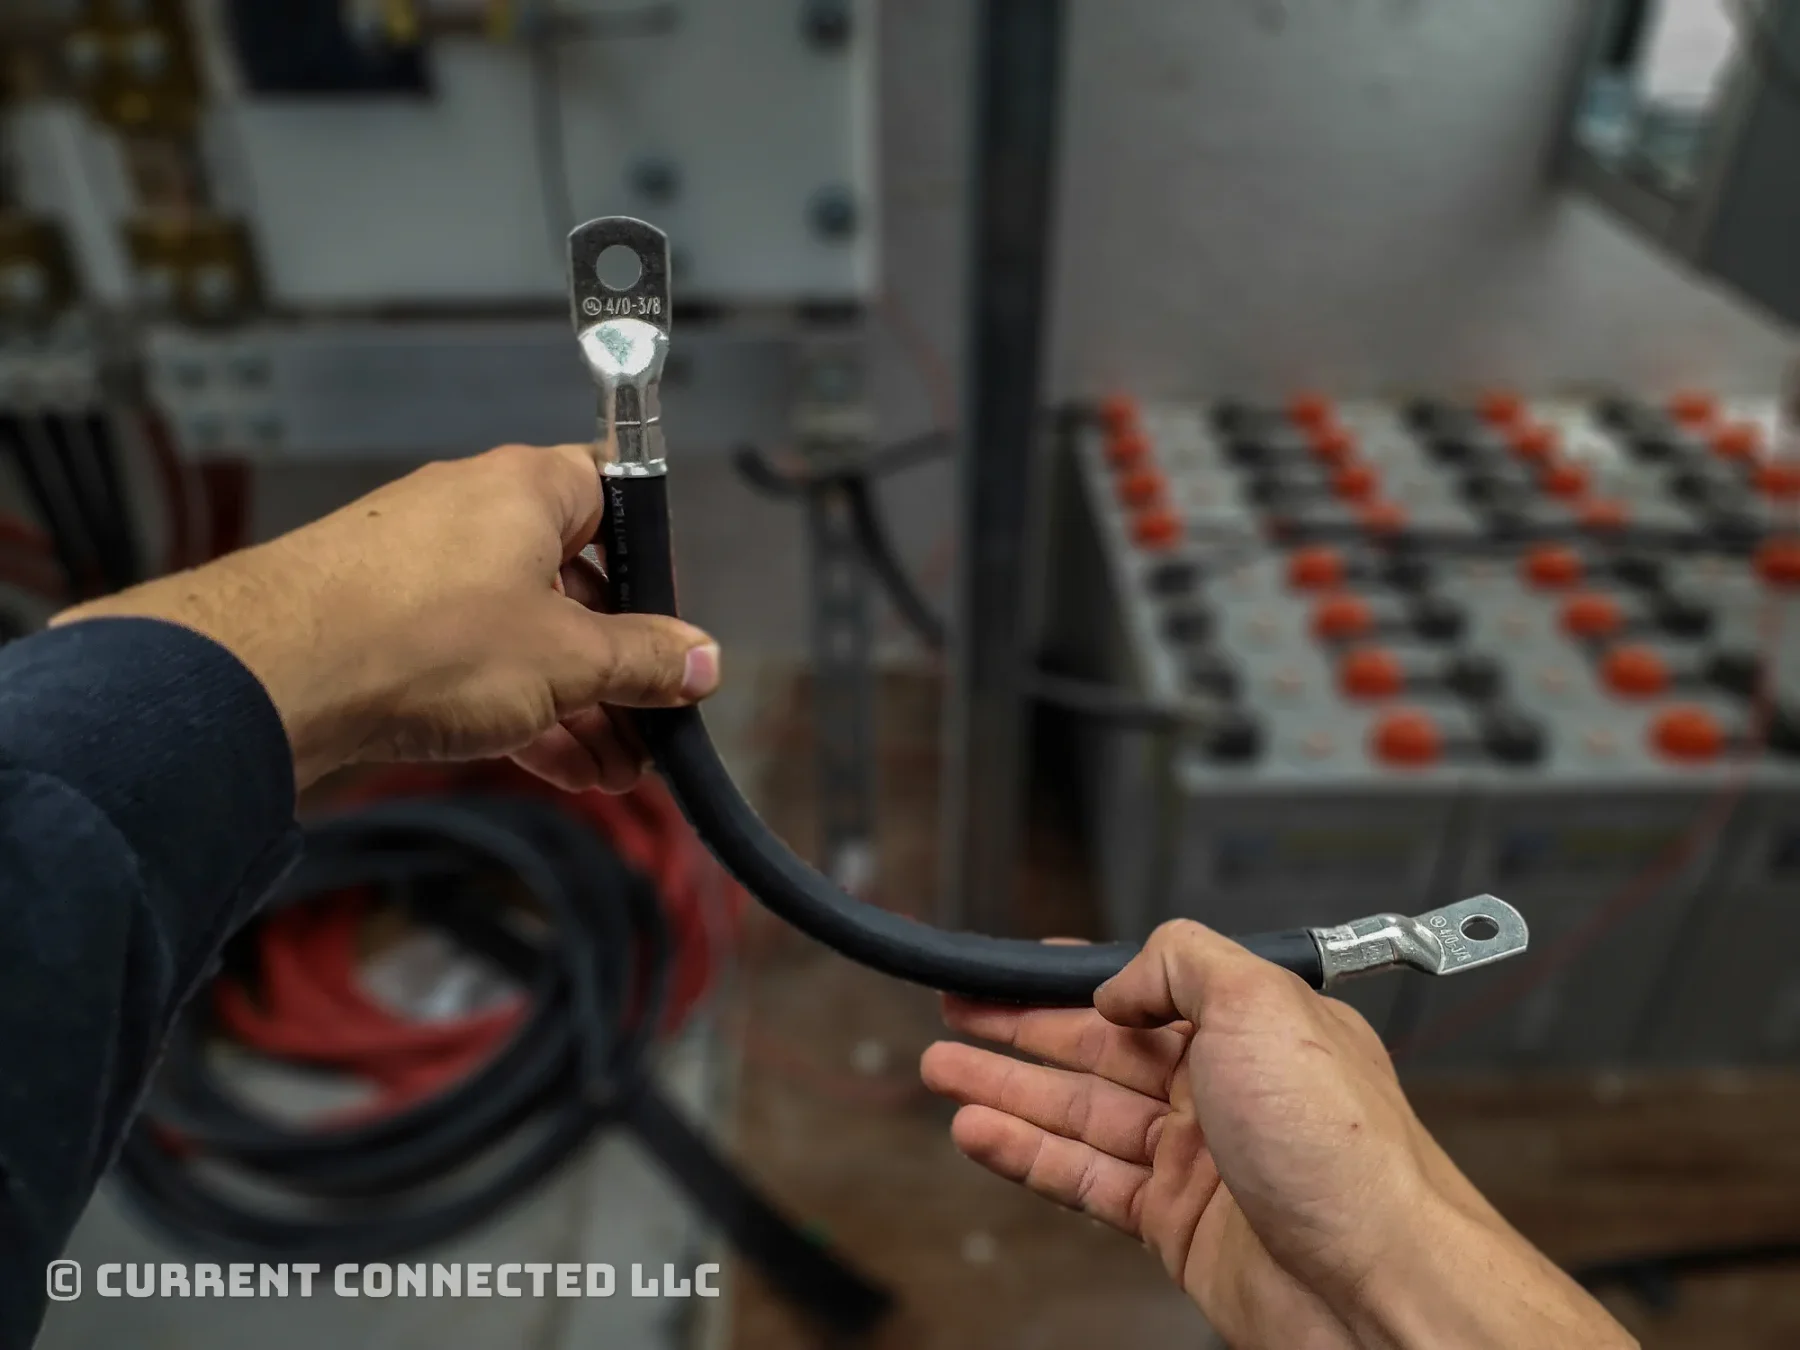
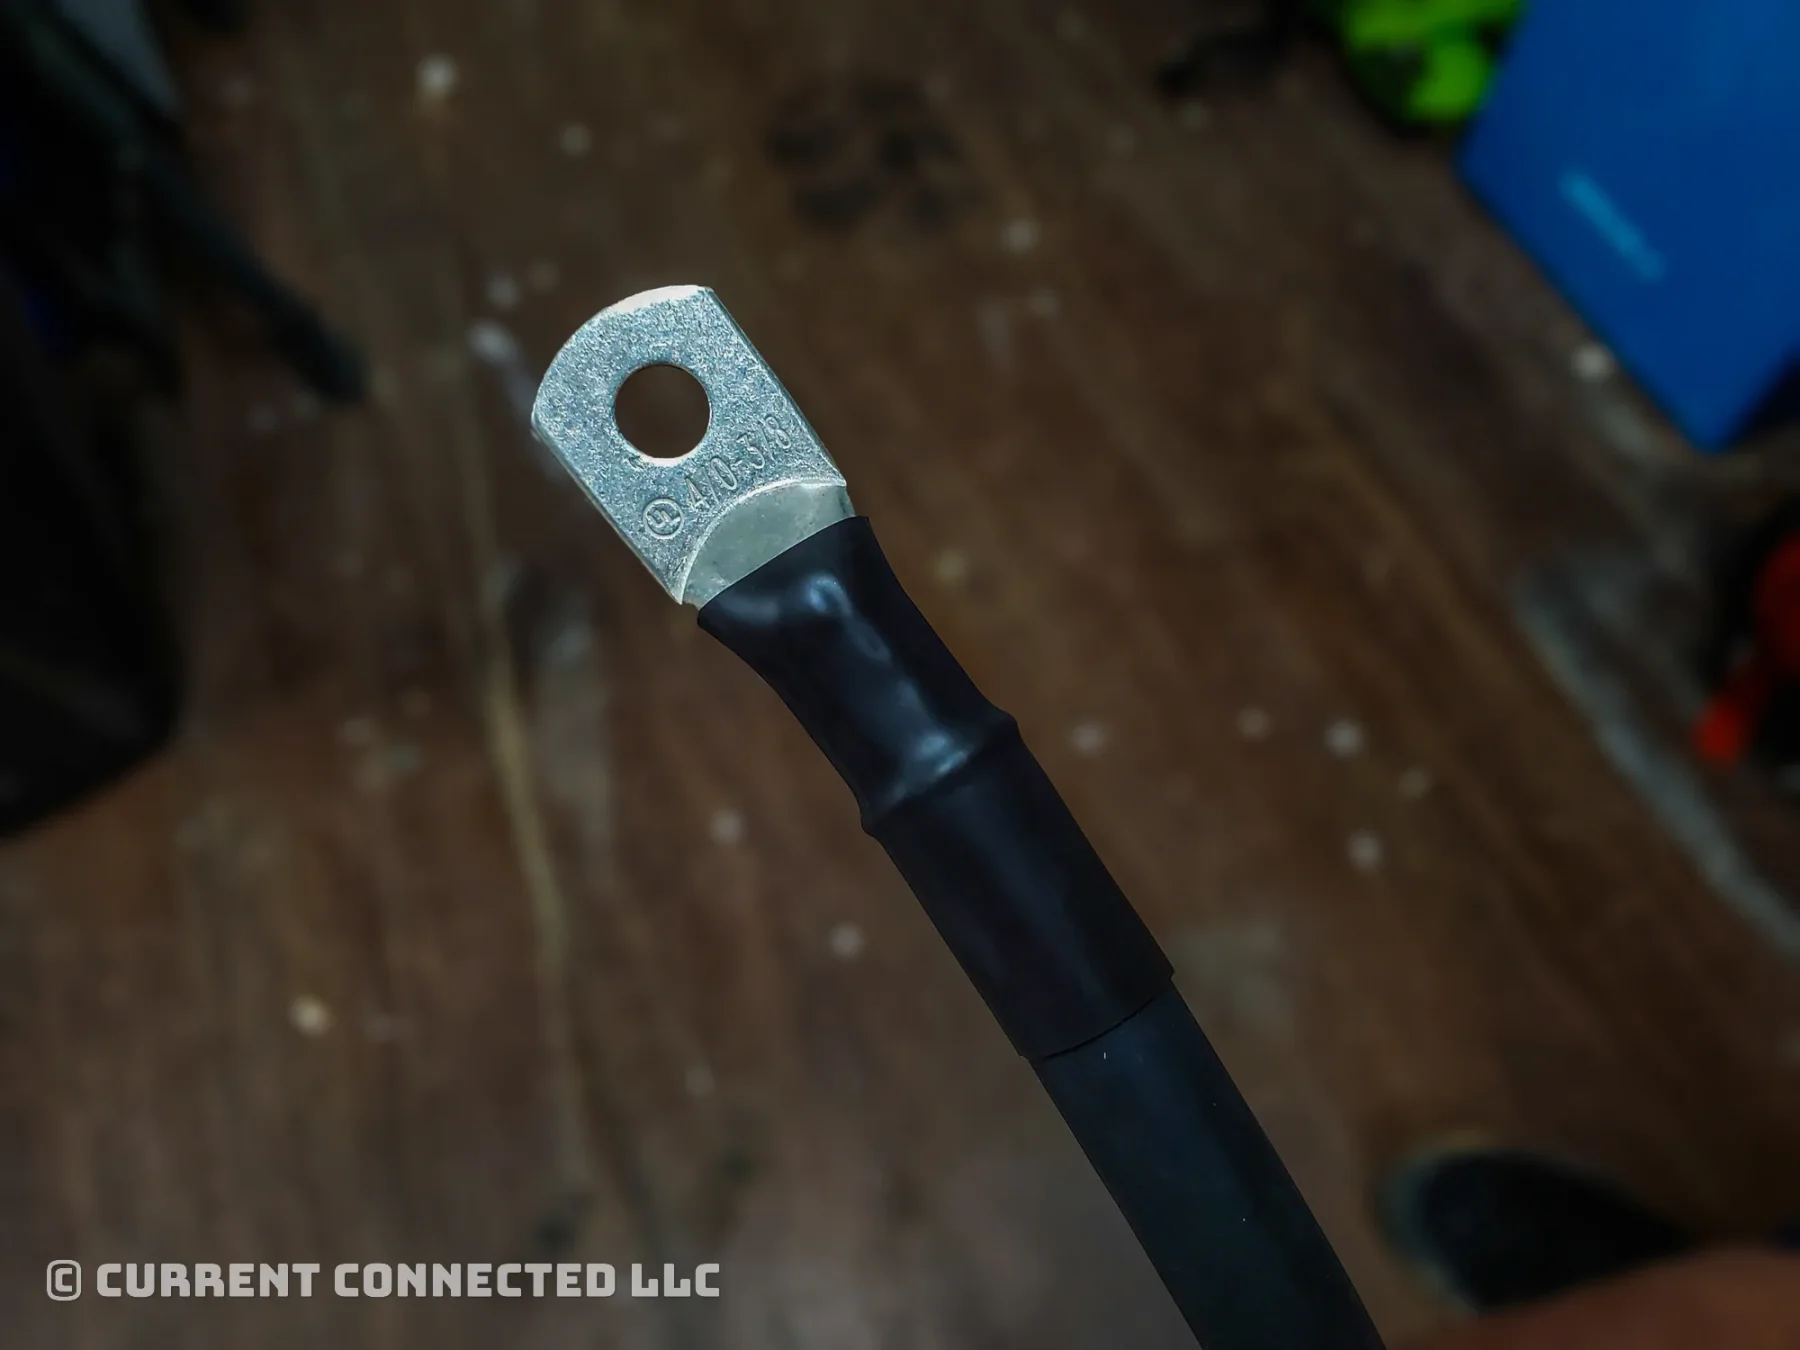
Step 11: Success!
Your cable should look like this.
Caution: Rotation
Thick cables cannot rotate between connection points. Make sure to rotate the lug if needed.
TIP
Align the cable and lug and then draw a line across them. Use this line to position the two components when crimping.

Step 12: Second Lug
Align the marks and crimp the second lug. Remember to fully insert the lug and maintain pressure while crimping.
Step 13: Test Fit
Test the cable to make sure it is the correct length and has the correct rotation.
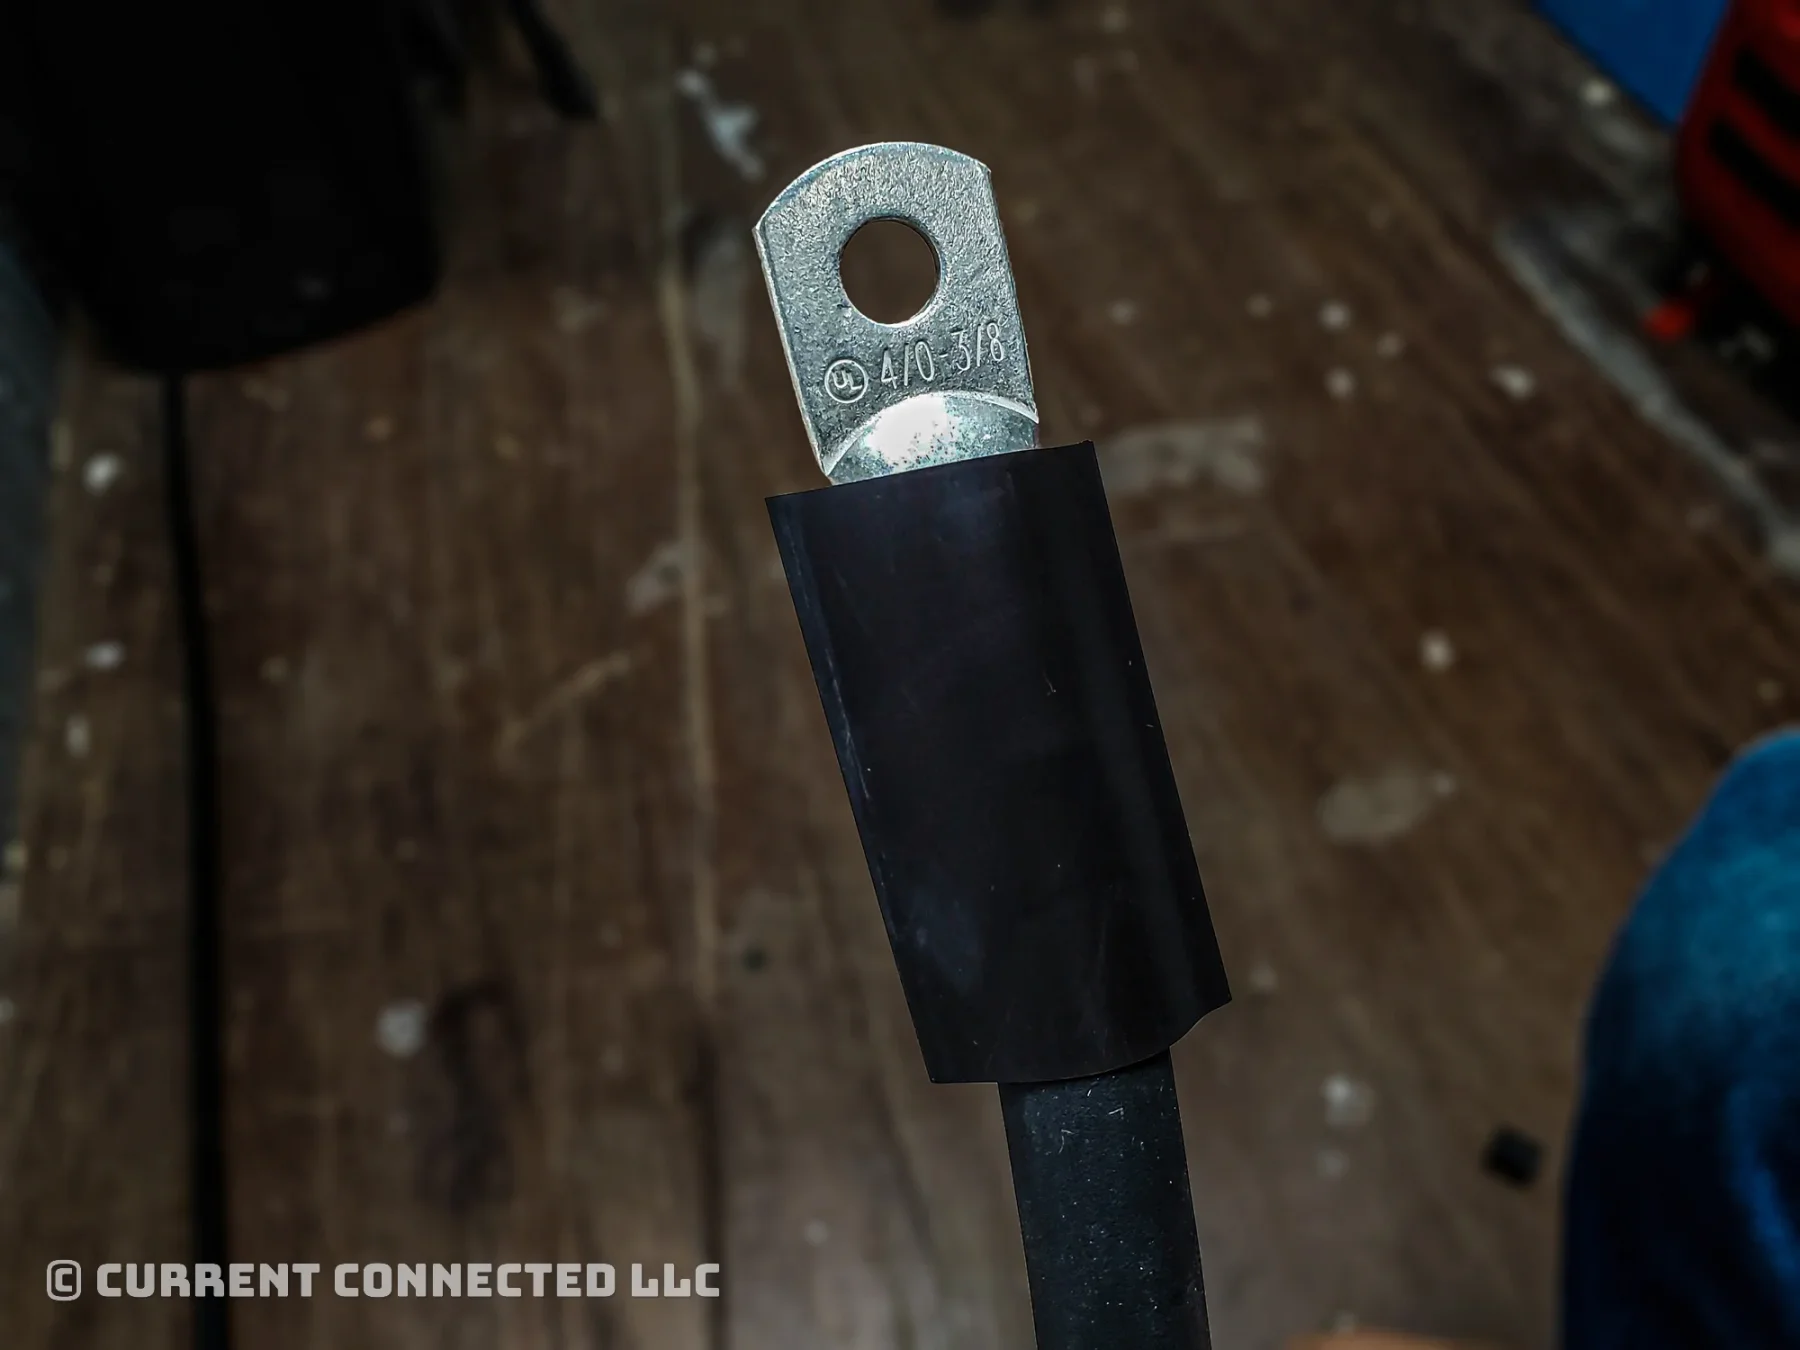
Step 14: Select Heat Shrink
Choose the right length and size of heat shrink.
This 4/0 cable uses 3:1 heat shrink tubing that is 1.5in wide and 3in long. Smaller cables use shorter lengths.
Note
Heat shrink protects the cable from moisture intrusion and relieves stress on the crimp.
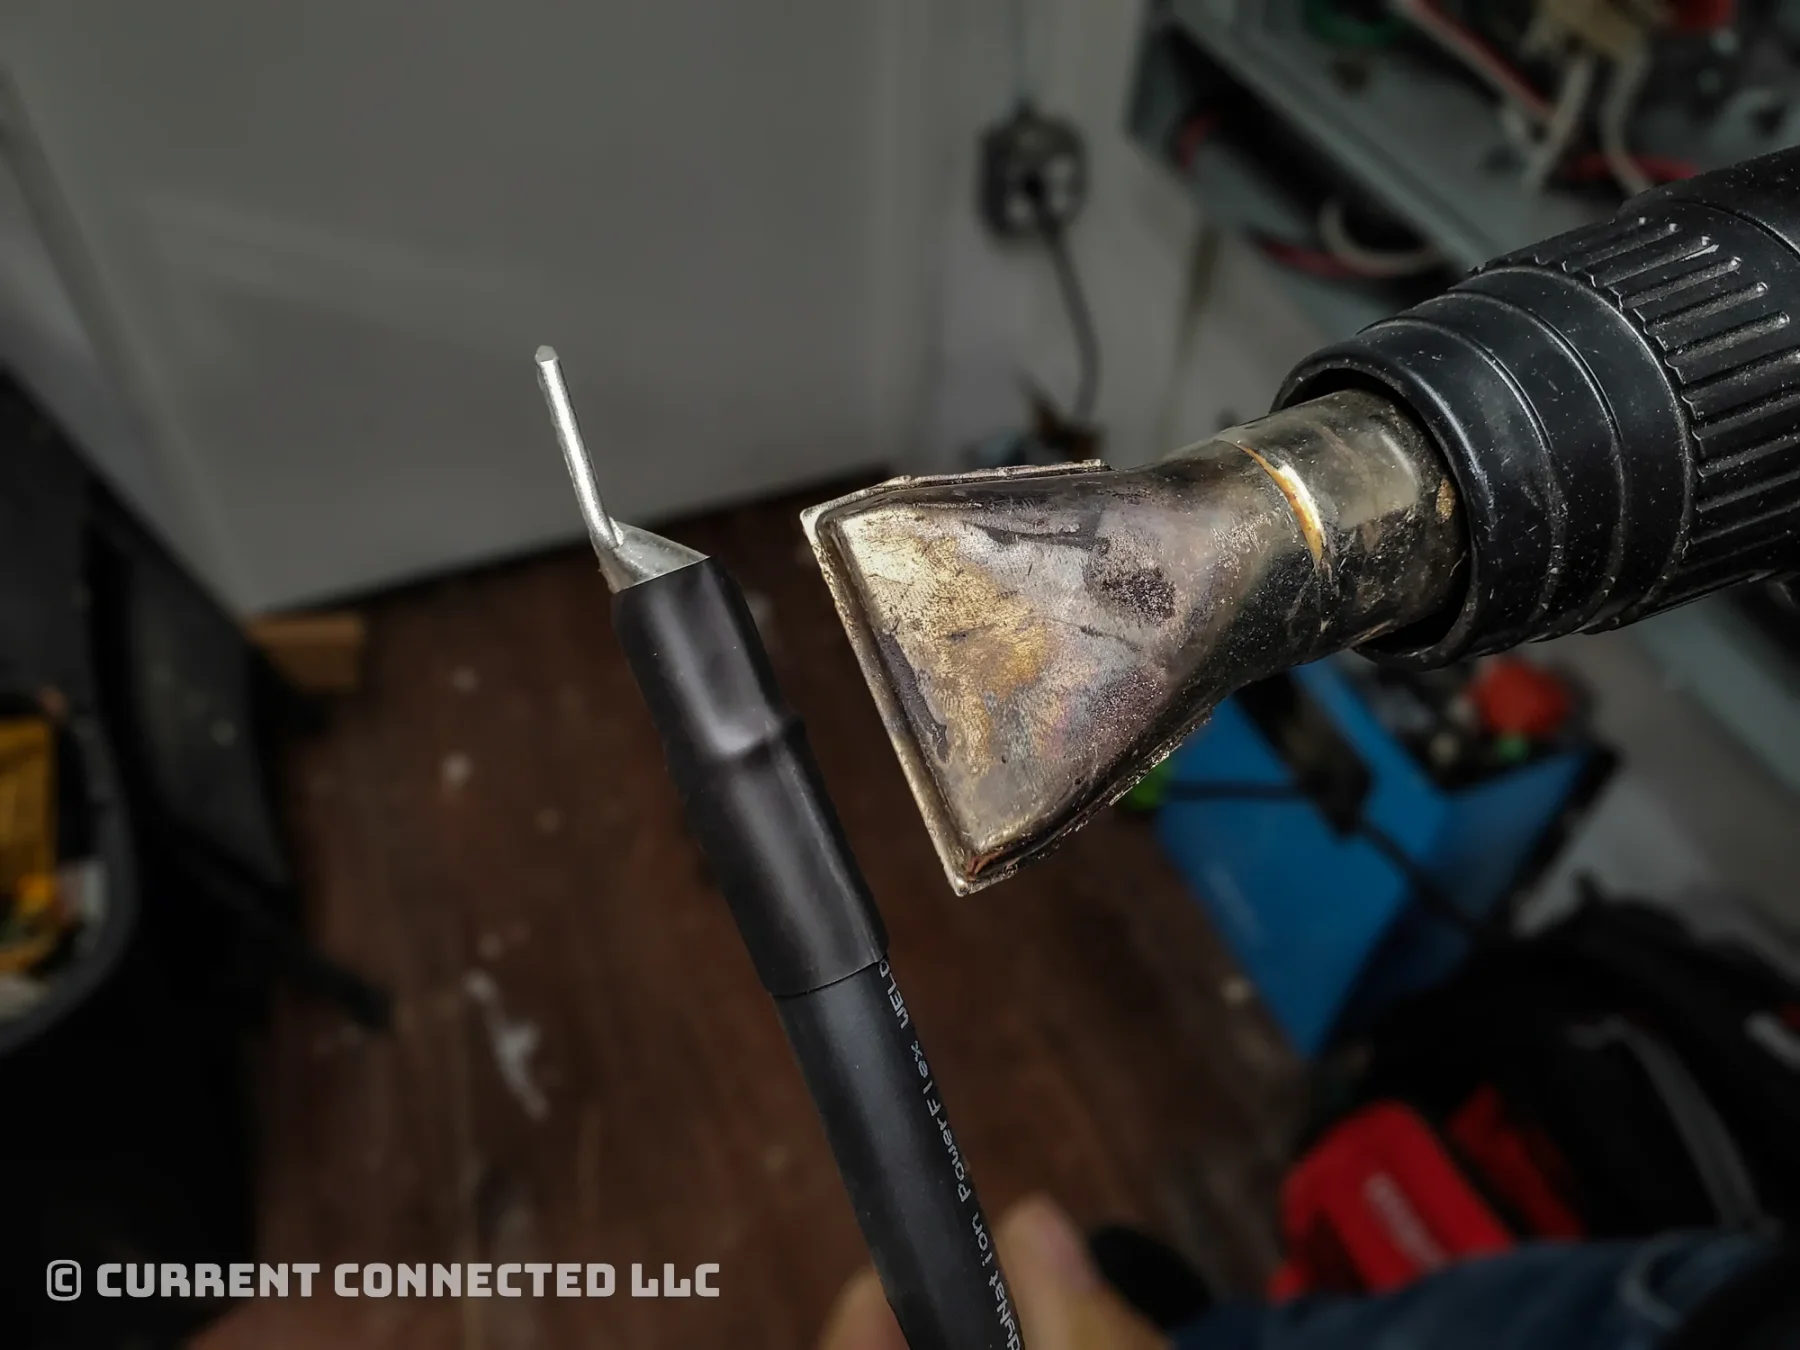
Step 15: Install Heat Shrink
Use a heat gun to install the heat shrink. Rotate the cable during installation. Our gun has a wide tip to spread the heat across the entire width.
Step 16: Completion!
You now have a properly crimped cable that's safe to use!
Frequently Asked Questions
No. Soldered joints are not to code in most installations and are forbidden in marine applications. Soldered joints can cause catastrophic overheating, melted solder, and other issues.
The most secure connection includes quality lugs, quality fine strand tined wire, a quality crimp, and adhesive lined heat shrink tubing. Studies have shown that a proper mechanical crimp with a hydraulic tool can cold weld the copper to the terminal. This cold weld provides a stronger connection than solder.
We recommend it, but it is optional. Adhesive heat shrink provides a more durable connection, and we highly recommend it for marine applications or environments with high humidity.